Upgrading your computer’s storage to a faster SSD is one of the easiest and most effective ways to boost performance. But, what if you want to transfer your entire Windows 11 system—including all your files, apps, and settings—to a new SSD? The answer: cloning your boot drive! Don’t worry, it’s easier than it sounds, and I’m here to guide you through the whole process.
I’ve done this several times, and the key to a smooth transition is using a tool like EaseUS DiskCopy—it makes cloning your boot drive a walk in the park. So, let’s dive into the steps, and I’ll walk you through the entire process!
Why Clone Your Boot Drive?
Before we jump into the how-to, let’s quickly touch on why cloning your boot drive is such a great idea:
- No reinstalling Windows: You don’t have to go through the hassle of reinstalling Windows 11 or all your programs.
- Fast and simple: Cloning is fast and straightforward.
- Complete transfer: It transfers everything—your operating system, apps, files, settings—just as they are.
What You’ll Need
Here’s what you’ll need to get started:
- Your new SSD: Make sure it’s large enough to hold all the data from your old boot drive.
- A USB-to-SATA adapter (if you’re cloning to an external SSD).
- EaseUS DiskCopy: This is the software I recommend. It’s user-friendly and reliable.
How to Clone Your Boot Drive to a New SSD (Windows 11)
Install EaseUS DiskCopy
- First, download and install EaseUS DiskCopy on your PC. It’s a straightforward process—just follow the on-screen instructions.
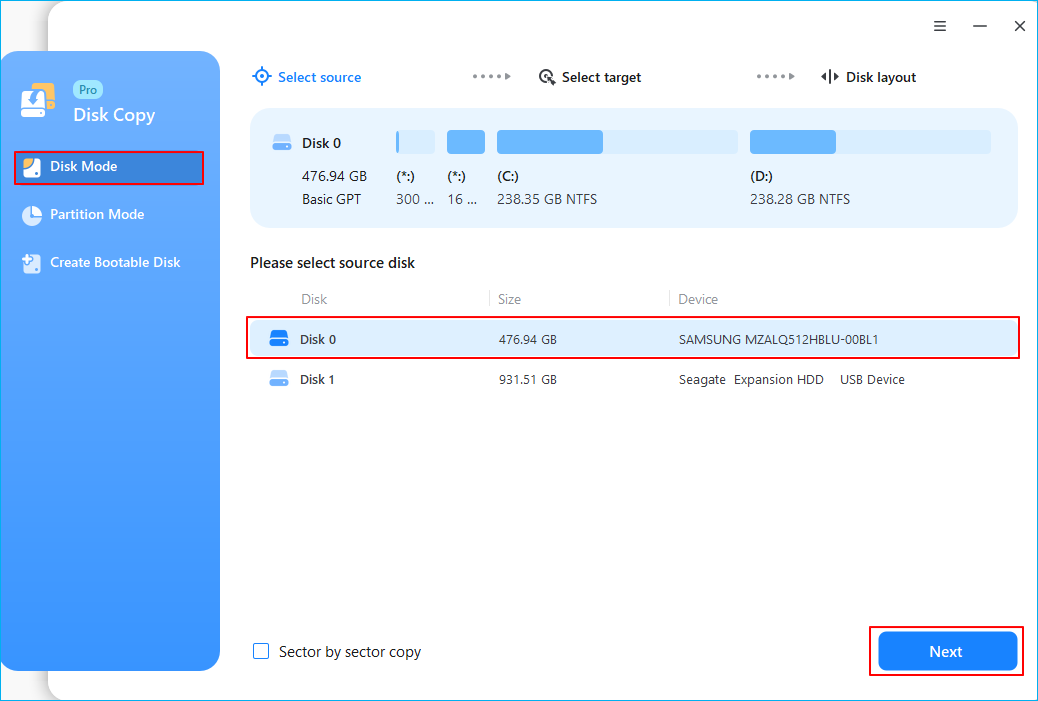
Step 1. To start copying/cloning an entire disk to another, choose this disk as the source disk under "Disk Mode" and click "Next".
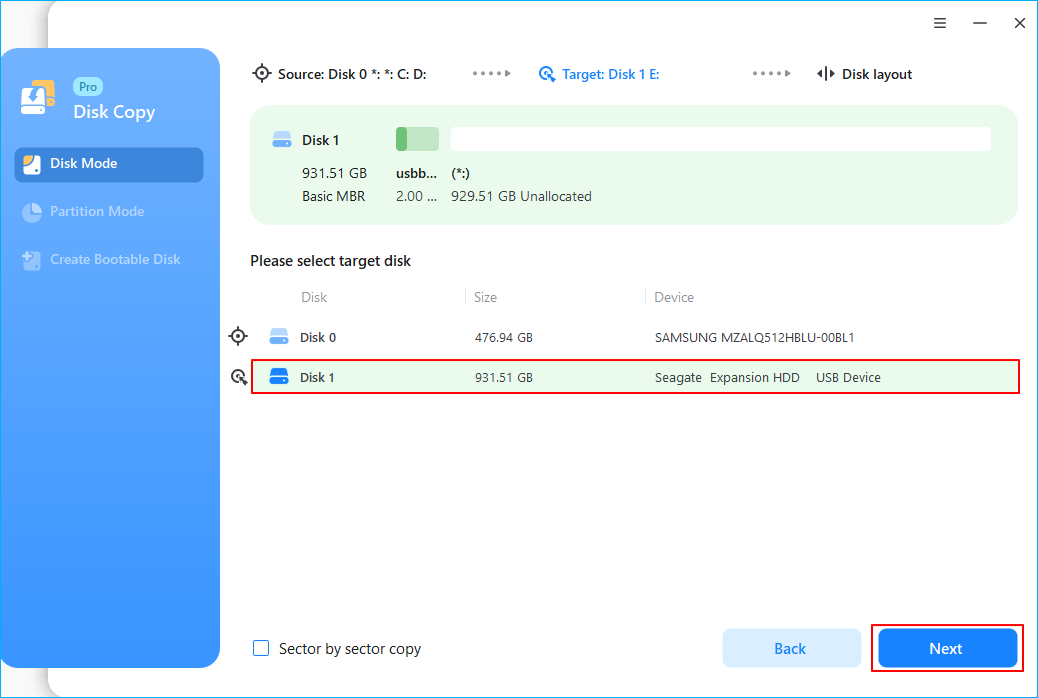
Step 2. Choose the other disk as the destination disk.
Step 3. Check the disk layout of the two disks. You can manage the disk layout of the destination disk by selecting "Autofit the disk", "Copy as the source" or "Edit disk layout".
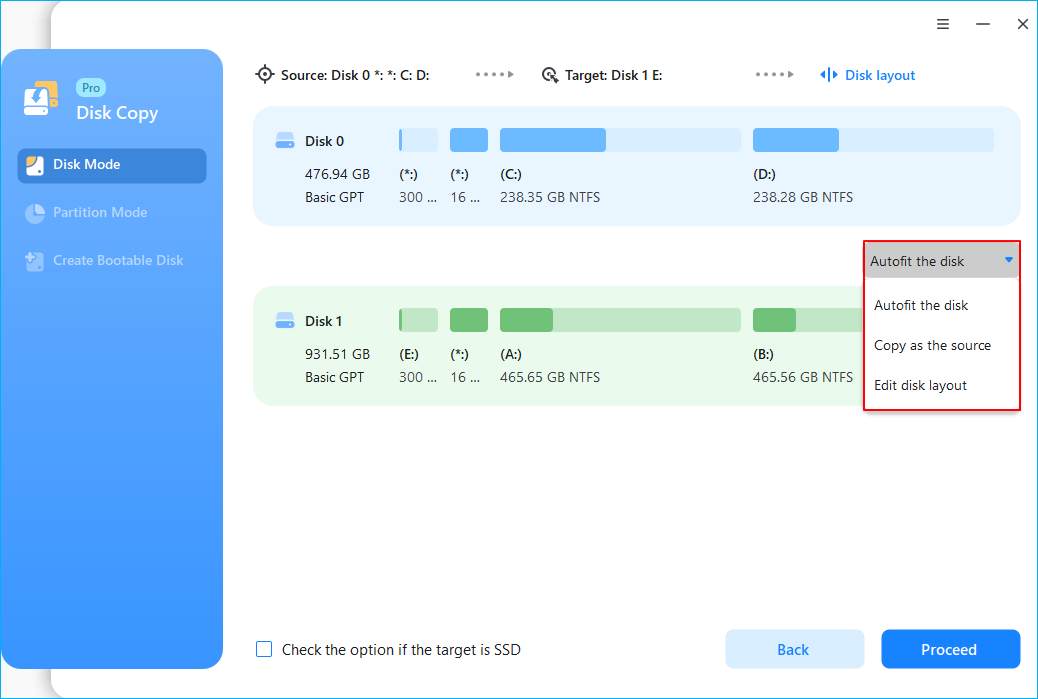
- "Autofit the disk" makes some changes by default on the destination disk layout so that it can work at its best status.
- "Copy as the source"does not change anything on destination disk and the layout is the same as source disk.
- "Edit disk layout" allows you to manually resize/move partition layout on this destination disk.
Tick the "Check the option if the target is SSD" option to put your SSD in its best performance.
A message now appears, warning you that data will be lost. Please confirm this message by clicking "OK" and then click "Next".
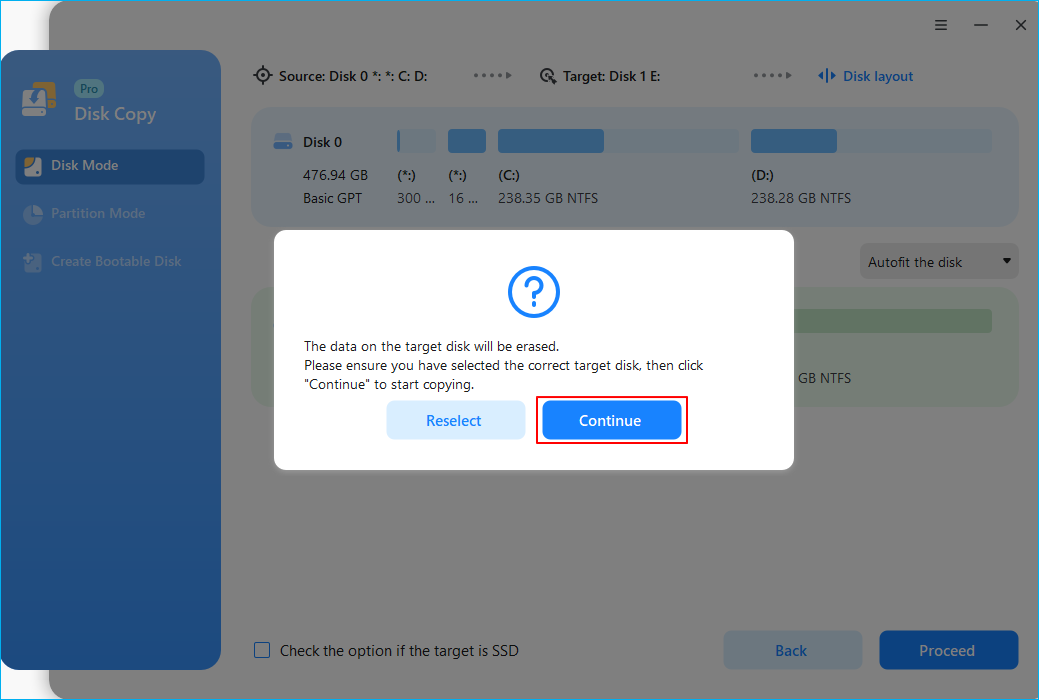
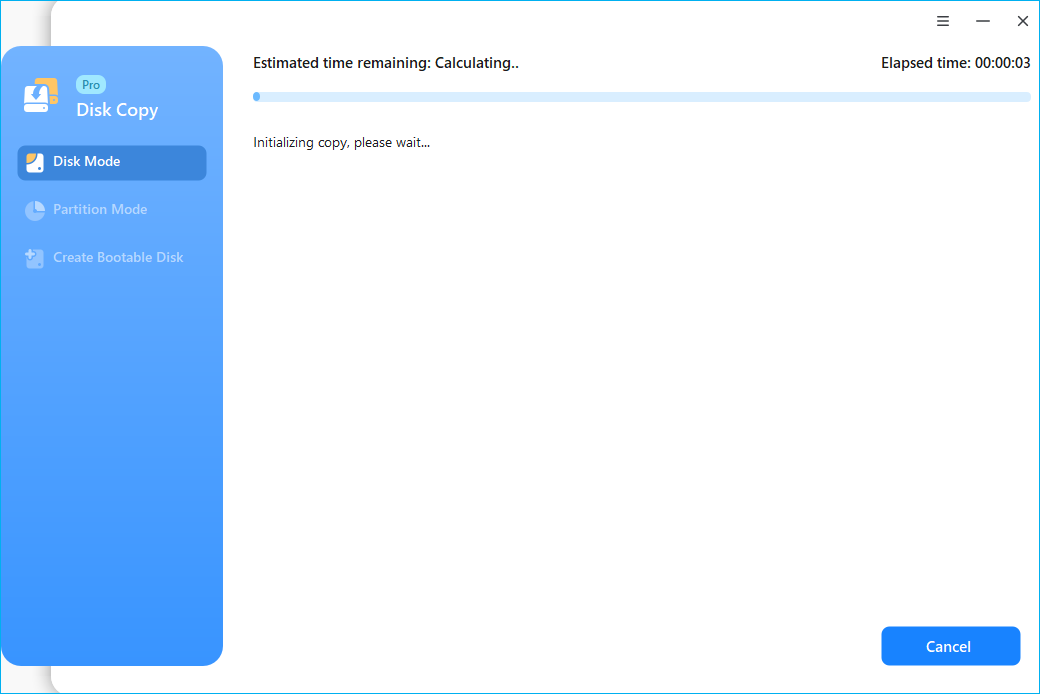
Step 4. Click "Proceed" to officially execute the task.
Why I Recommend EaseUS DiskCopy
- Simple Interface: EaseUS DiskCopy is super easy to use—no complicated steps or technical jargon.
- Safe Cloning: It ensures that your data is cloned accurately and securely without any risk of losing files.
- Fast: The cloning process is quick, and you won’t have to spend hours waiting.
- Cloning Everything: It transfers your entire OS and files, so you don’t have to reinstall anything.
Final Thoughts
Cloning your boot drive to a new SSD on Windows 11 doesn’t have to be complicated, especially with tools like EaseUS DiskCopy. You’ll have your new, faster SSD up and running in no time, with everything intact just the way it was.
If you’re tired of slow boot times or just need more space, give cloning a try—it’s the fastest way to get all the benefits of an SSD without starting from scratch.
Have fun, and enjoy your super-fast, cloned Windows 11 setup! 😎💻

