Partitioning a hard drive on Windows 11 without risking your data might sound a bit nerve-wracking, but with the right tool, it’s actually pretty straightforward. When I recently had to split my drive, I wanted a method that wouldn’t require backing up everything first or risk messing up my files. After a bit of research and trial, I found that EaseUS Partition Master was the ideal choice for this. Here’s why I went with it, how it works, and some personal tips.
Why I Recommend EaseUS Partition Master
First off, EaseUS Partition Master is super user-friendly. For anyone who isn’t deep into IT, it’s a lifesaver because it keeps things simple without sacrificing functionality. What really sold me was the “Resize/Move” feature—it makes it easy to adjust the partition sizes or create new ones without needing to wipe your drive or delete data. Plus, the interface is clear, so you always know which partition you’re working on.
Another thing I appreciated was how safe it felt. Partitioning can feel risky, but EaseUS does a great job of keeping everything secure by previewing changes before you commit to them. That way, you don’t accidentally hit a wrong button and mess up your data.
How to Partition Your Drive with EaseUS Partition Master
Here’s the quick rundown of how I partitioned my drive without losing data:
Step 1. Download and Install: First, download EaseUS Partition Master. The installation is quick, and the free version covers most basic partitioning needs.

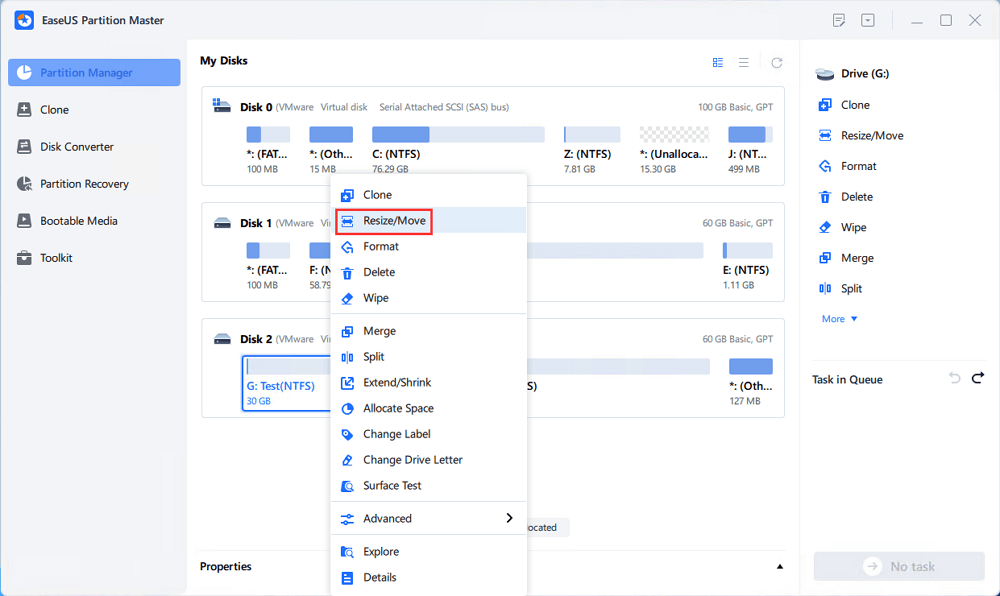
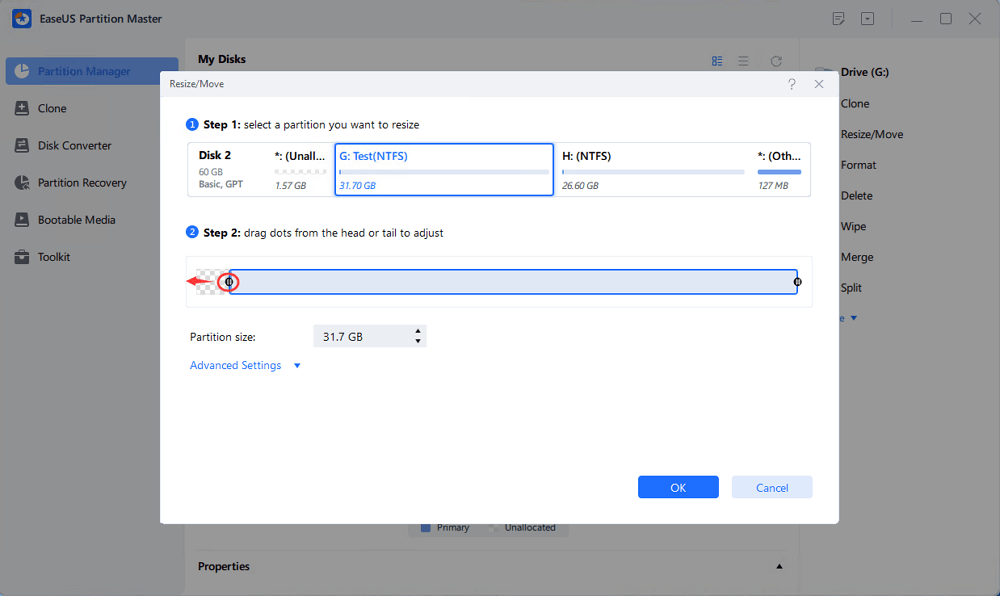
Step 2. Launch EaseUS Partition Master and go to Partition Manager, select the target drive/partition to adjust its size, right-click on it and choose "Resize/Move".
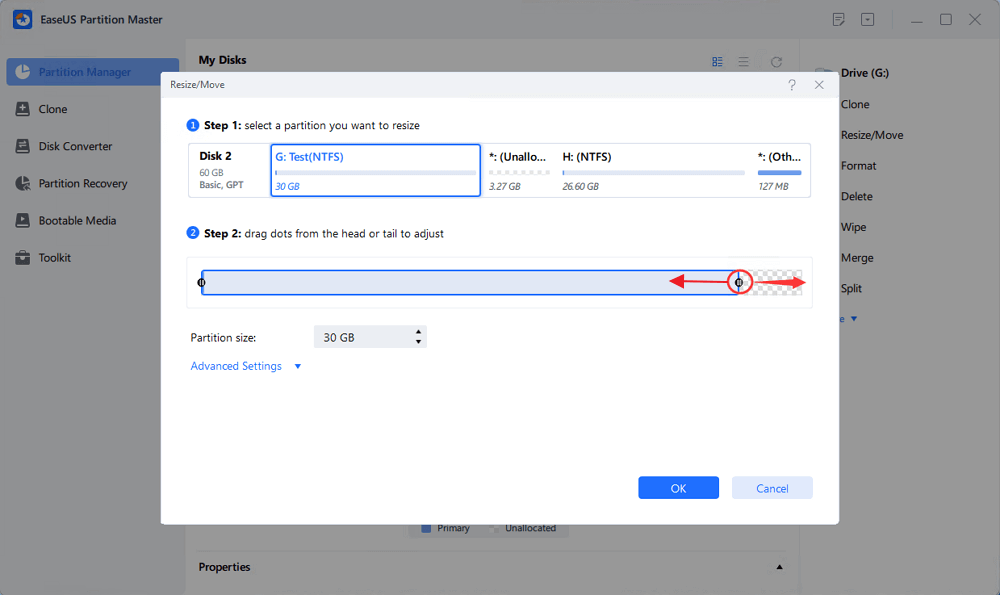
Step 3: To shrink the partition, simply drag one of its ends to free up unallocated space. Once done, click "OK".
Step 4. To extend the partition, make sure that there is unallocated space aside (if there isn’t, follow the above steps to create some). In the same way, drag your mouse into the unallocated space. Click "OK".
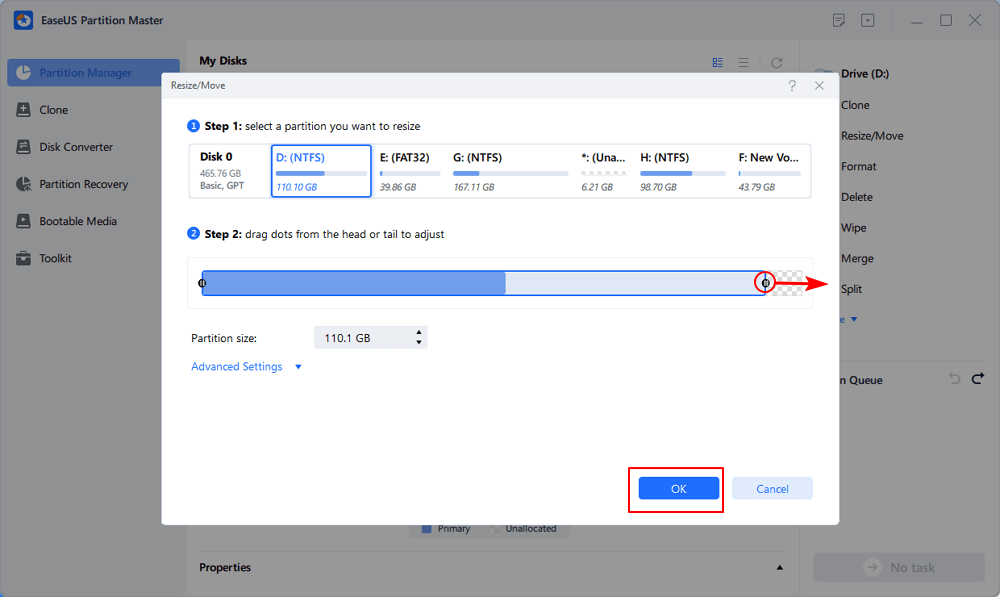
Step 5. To move a partition position, you need to leave unallocated space next to the target partition. If no, free up some unallocated space first.
Right-click the target partition, select "Reize/Move". Then drag the whole partition leftward or rightward to adjust its position. Click "OK" to confirm.
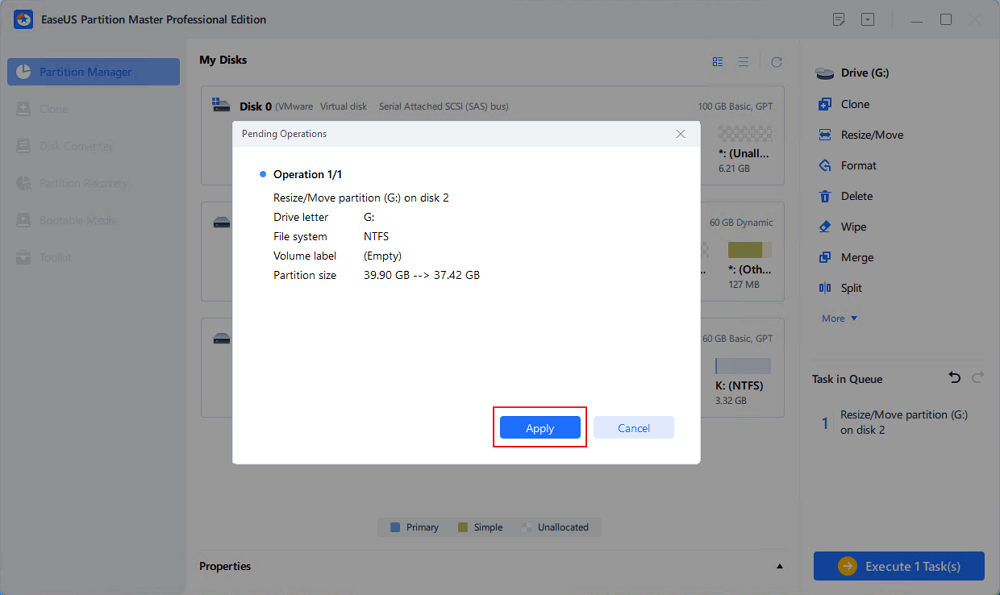
Step 6. Confirm the result and apply changes
At this step, you will see the new disk partition information & diagram.
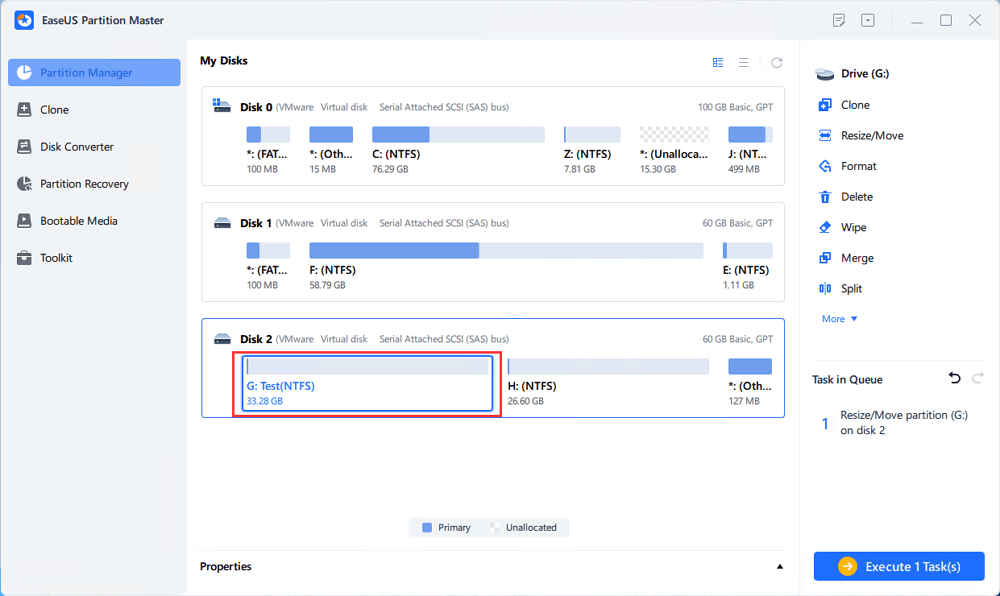
To save changes, click the "Execute Task" button and then "Apply".
You can download it here:

My Thoughts on Using EaseUS Partition Master
The whole thing took maybe 15 minutes, and my data was untouched. Having used other software in the past, I found EaseUS Partition Master to be incredibly reliable and simple to use. It’s also got some handy additional features, like merging partitions or converting file systems, so it’s a good long-term tool to have if you do more than just basic storage management.
So, if you’re new to partitioning or just want a hassle-free way to manage your hard drive on Windows 11, I’d say give EaseUS Partition Master a try. It makes what can be a tricky process feel like a breeze, and you get peace of mind knowing your data is safe.


