Dealing with a corrupted hard drive can be a frustrating ordeal, especially when it contains vital data. Fortunately, Windows 11 users have a variety of tools at their disposal to attempt recovery of their precious files. One such tool that stands out due to its efficacy and ease of use is Aiseesoft Data Recovery. In this blog, I’ll guide you through the steps to recover data from a corrupted hard drive using this software, based on my own experiences.
Step 1: Diagnose the Extent of Corruption
Before attempting any recovery, it’s important to understand the level of damage to your hard drive. If your computer still recognizes the drive but cannot access the data, there’s a good chance that recovery software can help. If the drive isn’t recognized at all, you might need professional assistance.
Step 2: Install Aiseesoft Data Recovery
Download and install Aiseesoft Data Recovery from their official website. I found the installation process straightforward — just follow the on-screen instructions. This software is safe and doesn’t install any unwanted bloatware.


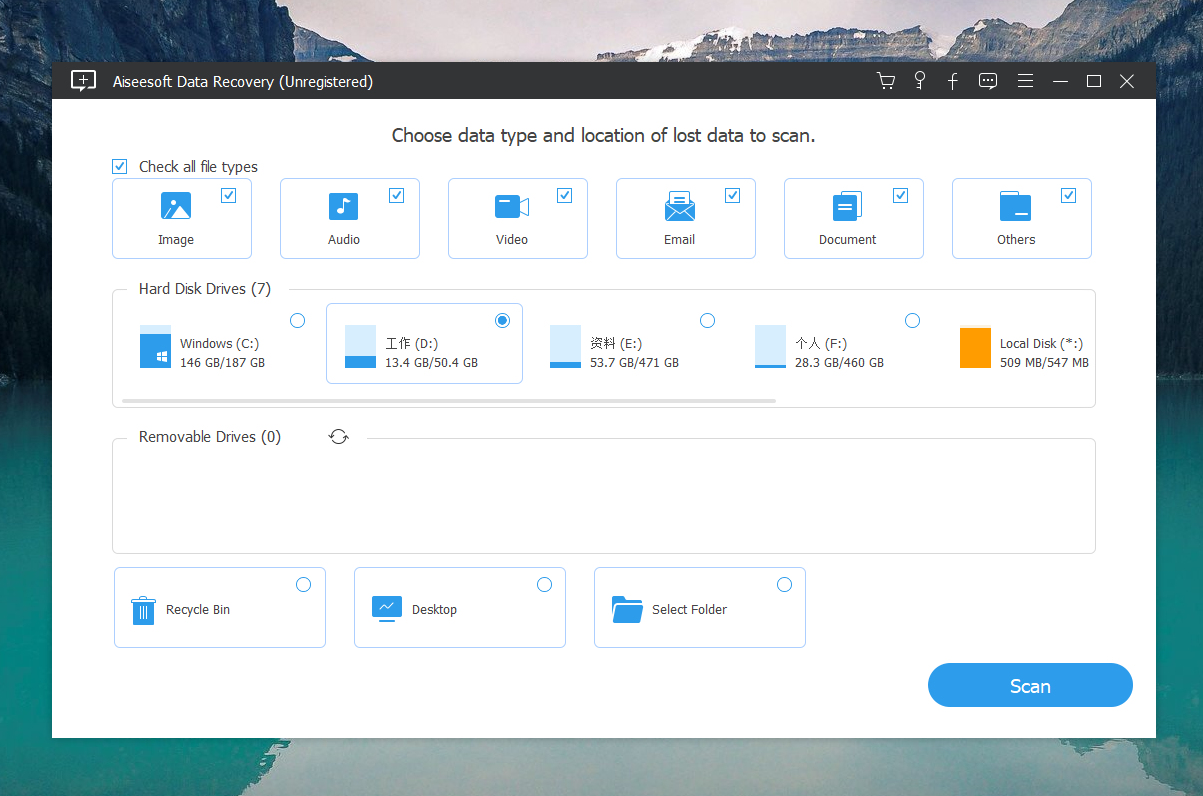
Step 3: Launch the Software and Select Your Drive
Once installed, open the application. You’ll see a window where you can select the types of files you want to recover (such as Emails, Photos, Documents, etc.). Make your selections based on what you’re trying to recover. Next, select the corrupted drive from the list of available drives. Ensure the drive is connected to your PC if it’s an external one.
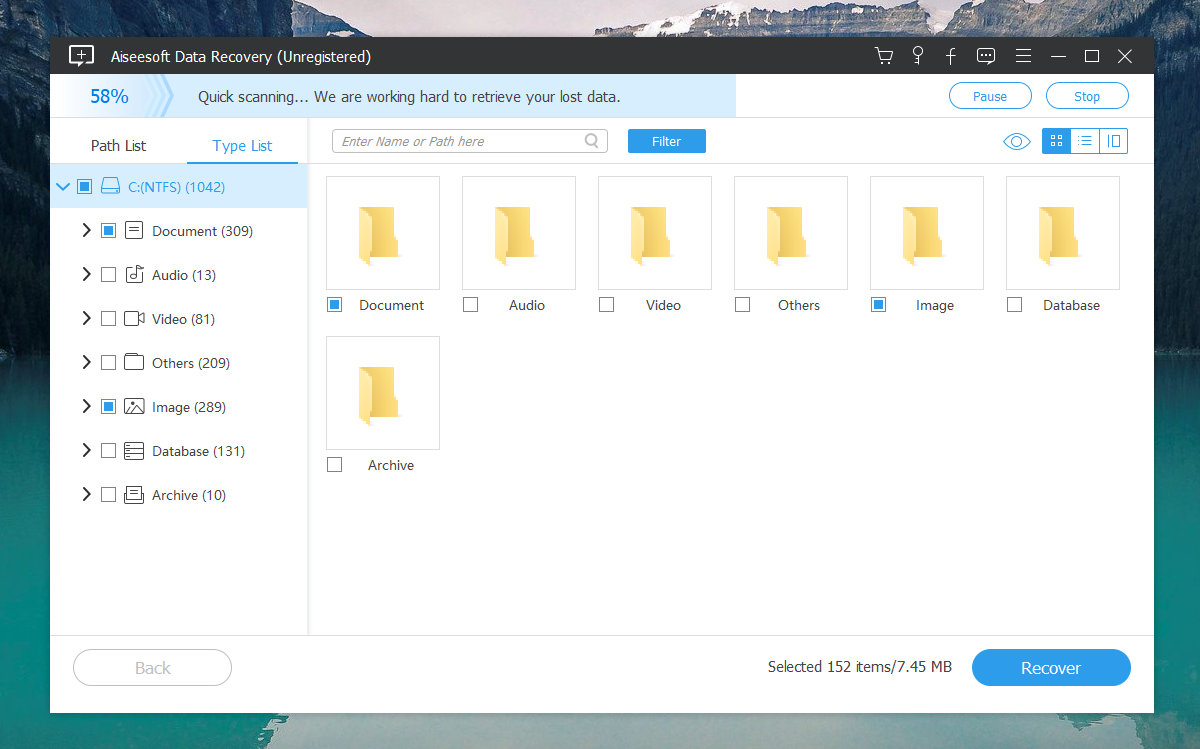
Step 4: Scan the Corrupted Drive
With the drive and file types selected, click on the "Scan" button. Aiseesoft Data Recovery offers two scanning modes: Quick Scan and Deep Scan. Start with Quick Scan; it’s faster and will retrieve recently deleted files. If it doesn’t find what you need, opt for Deep Scan, which is more thorough but takes longer.
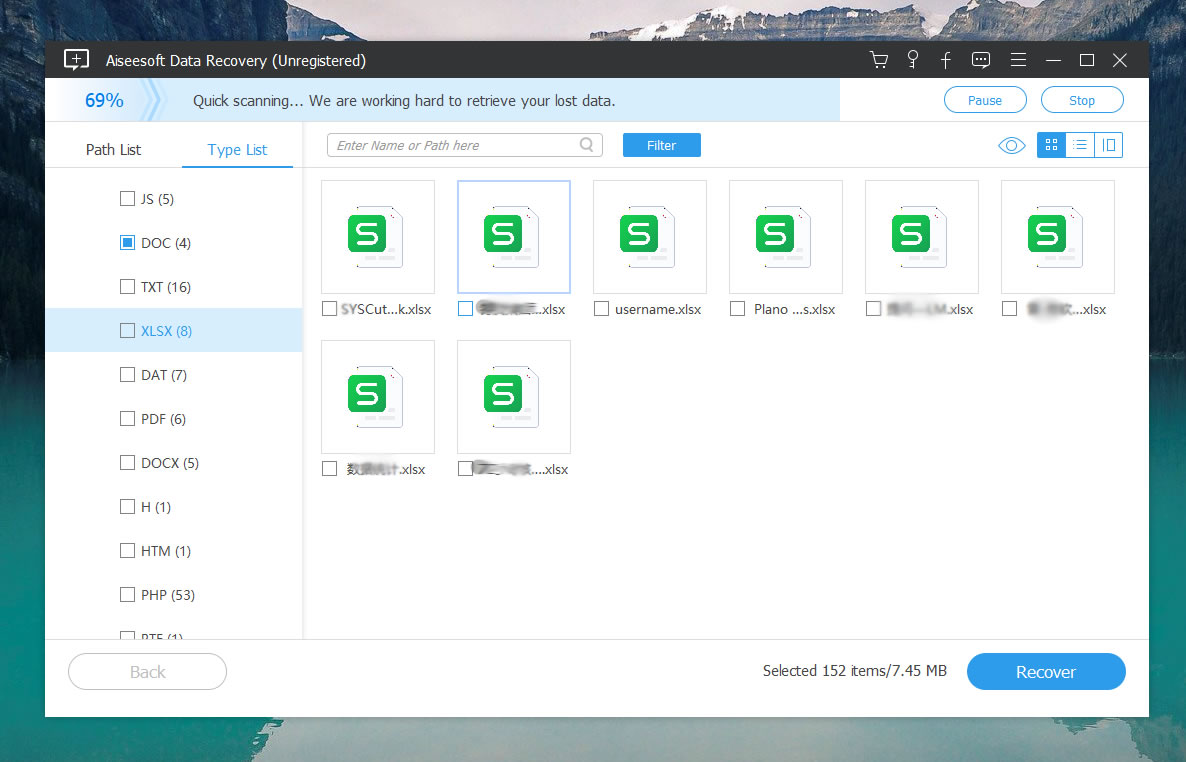
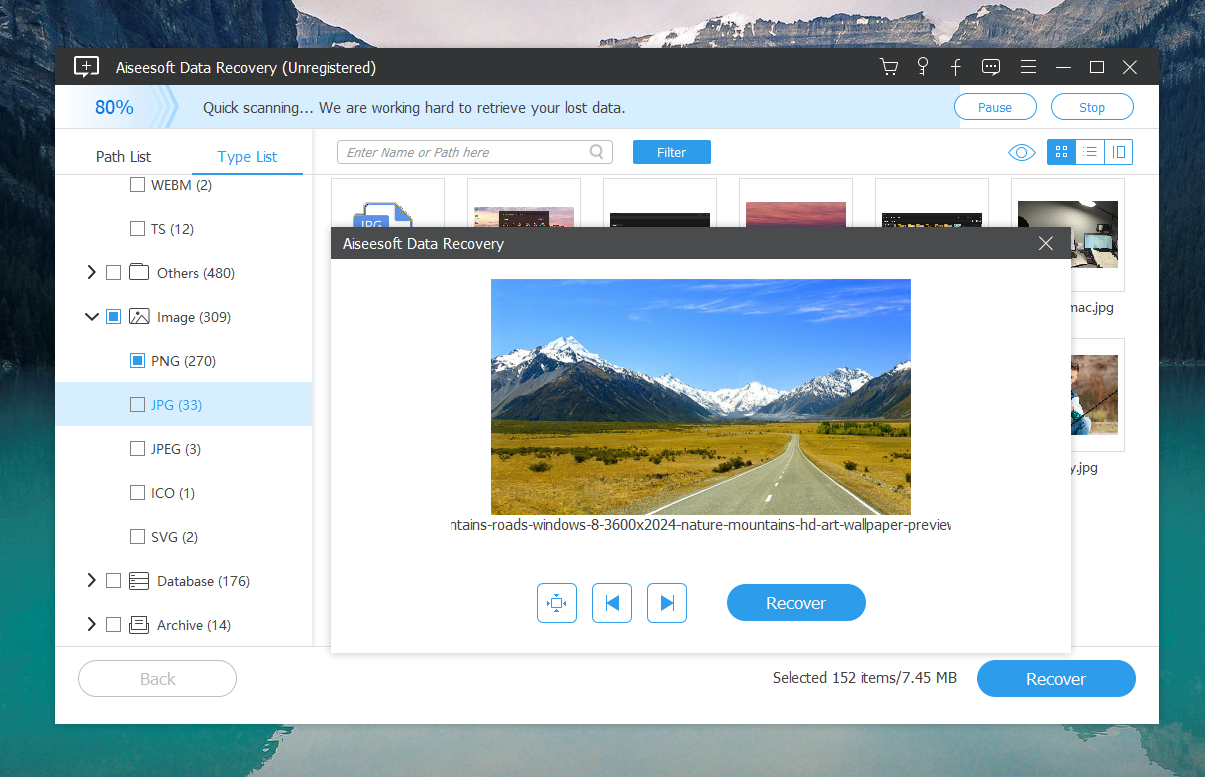
Step 5: Preview and Recover Files
After the scan is complete, the software will display a list of files that can be recovered. You can preview these files before recovery. Check the files you need and then click on the "Recover" button to save them. Always save the recovered files to a different drive to avoid overwriting any unrecoverable data.

The software typically works by scanning the selected storage device for lost or deleted files, then presenting the user with a list of recoverable items. Users can preview the files before recovery and choose which ones they want to restore.
Step 6: Back Up Your Data
Once you’ve recovered your data, it’s crucial to take preventive measures to avoid future data loss. Regularly back up your data to an external drive or cloud storage. This can save you from the stress and potential loss of data corruption or hardware failure.
My Experience with Aiseesoft Data Recovery
Using Aiseesoft Data Recovery was a lifesaver when one of my drives became corrupted after a system update. The interface was user-friendly, and I was able to recover nearly all of my documents and photos. What I particularly appreciated was the ability to preview files before final recovery; it gave me confidence that what I was recovering was correct and intact.
Final Thoughts
Recovering data from a corrupted hard drive can be daunting, but with the right tools like Aiseesoft Data Recovery, it’s manageable. This software is a robust solution for anyone facing data loss, offering a range of features that cater to both novice and advanced users. Remember, the key to successful data recovery often lies in quick action and the right software. Good luck!