Screen recording is something I never knew I’d be doing so much of until I started working remotely and diving into creating tutorials, guides, and content. And honestly, it’s a total game-changer. Whether you’re recording a gaming session, capturing a Zoom meeting, or making a how-to video, having a solid screen recording tool can make all the difference.
I recently upgraded to Windows 11, and while the new interface is sleek and pretty, I wasn’t sure what the screen recording options were like. After some trial and error, I found a solution that’s perfect for anyone looking to capture both their screen and audio. Let me walk you through the steps and share my favorite tool for this job: Aiseesoft Screen Recorder.
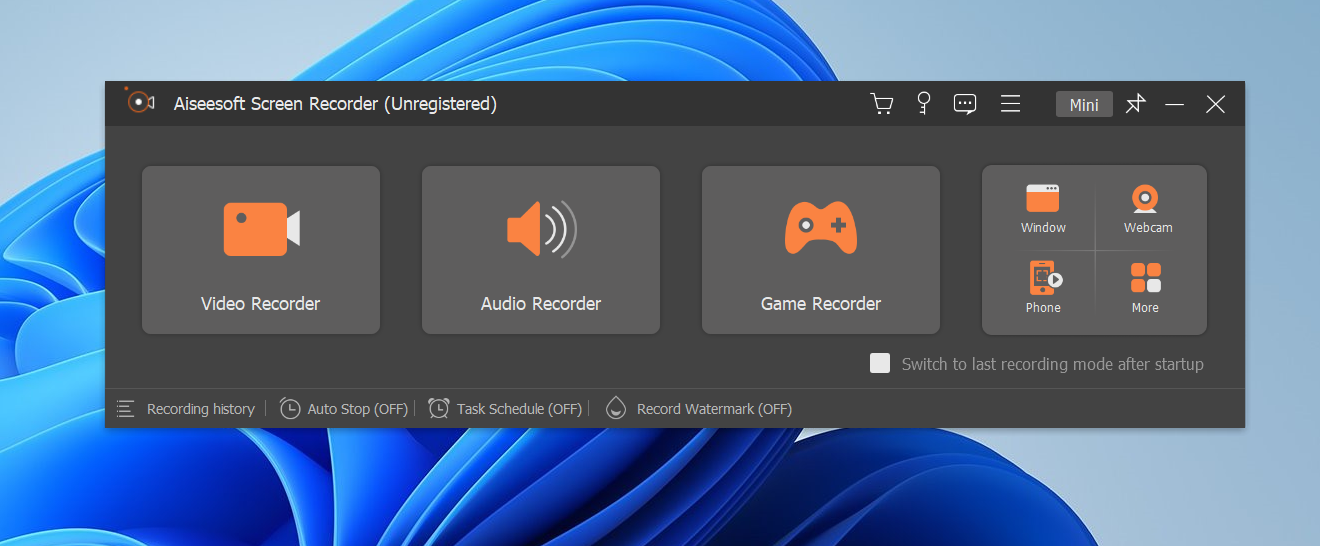
Aiseesoft Screen Recorder: Why I Recommend It
Aiseesoft Screen Recorder is a professional yet super user-friendly tool that allows you to record your screen with both system audio and microphone audio. It’s ideal for everything from casual recordings to professional tutorials. Here’s why I love it:
- Simple Setup: Getting started with Aiseesoft is a breeze. It doesn’t require any tech skills, and the interface is clean and intuitive.
- High-Quality Audio and Video: Whether you’re recording system sounds or your voice, the audio quality is crystal clear. Plus, the video quality is top-notch, even when recording in high-definition.
- Customization Options: You can select exactly which part of the screen you want to capture, and you can adjust the audio sources with ease.
- Extra Features: The tool offers additional features like adding annotations, drawing on the screen while recording, and more—all of which come in handy for tutorials and presentations.
Steps to Record Your Screen on Windows 11 with Aiseesoft Screen Recorder
Here’s a step-by-step guide on how to get started with screen recording using Aiseesoft:
1. First, head over to the Aiseesoft website and download the Screen Recorder. It’s available for both Windows and Mac. Installation is quick, and you can get started right away.


2. Once the program is installed, open it. You’ll be greeted with a simple interface that gives you options to record video, audio, or both. For this guide, we’ll focus on screen recording with audio.
3. You can choose to record the full screen or just a custom area. If you’re showing how to use a specific app or website, I recommend going with a custom area so that you only capture what’s necessary.
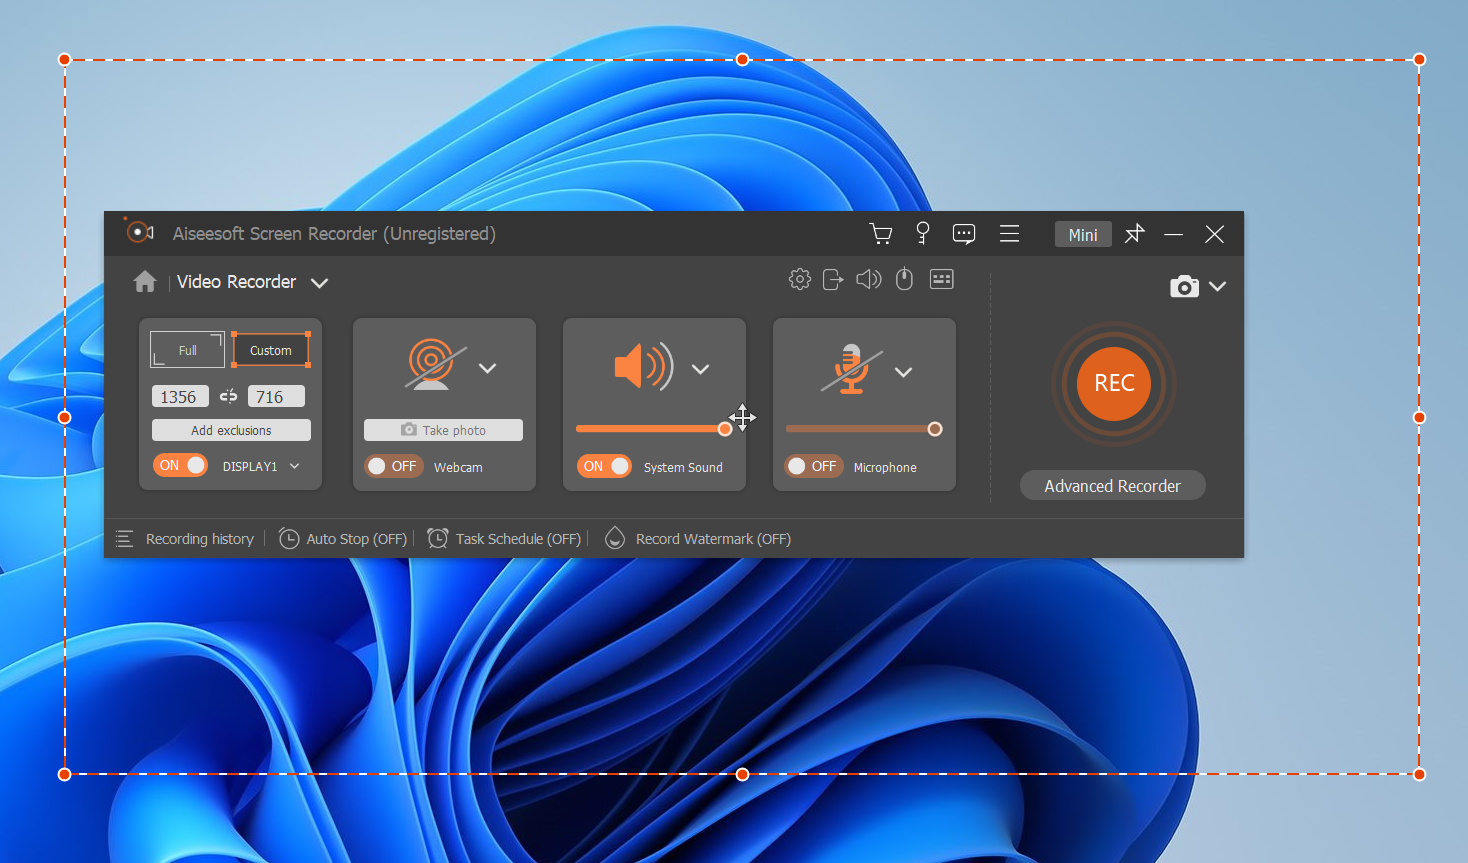
4. Start Recording
- Once everything is set up, hit the REC button, and the recording will begin. You’ll see a timer at the top, so you know how long you’ve been recording. If you want to stop recording, just click the stop button or press the hotkey (which you can customize).
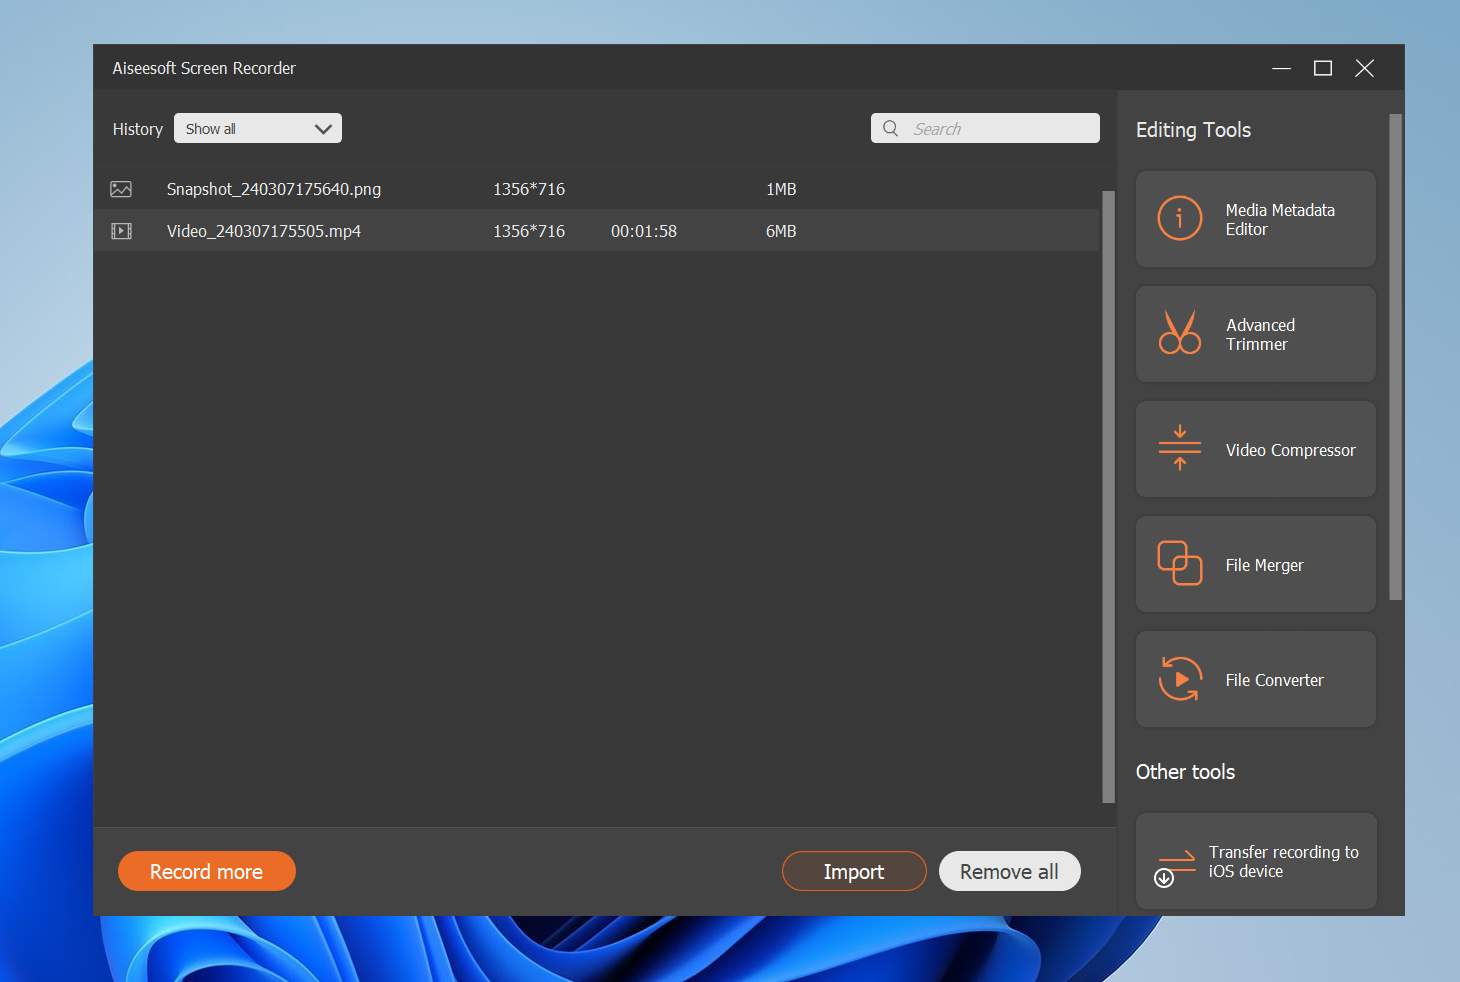
5. Edit and Save
- After stopping the recording, you’ll have the option to preview and trim your video. Aiseesoft also allows you to save the file in various formats, depending on what you need (MP4, MOV, AVI, etc.).
What I’ve Learned About Screen Recording on Windows 11
When I first got into screen recording on Windows 11, I wasn’t sure where to start. The default tools just weren’t cutting it—especially when it came to audio quality and customization options. I wanted something that would allow me to record both system audio (the sound from the computer) and microphone input (my voice).
While there’s the built-in Xbox Game Bar (which does okay for basic screen recording), I ran into issues with it not picking up both audio sources clearly. That’s when I decided to try Aiseesoft Screen Recorder, and I’m so glad I did.
Final Thoughts
If you’ve been struggling with screen recording on Windows 11 or simply want a more robust solution that also handles audio seamlessly, Aiseesoft Screen Recorder is definitely worth checking out. It’s simple to use, offers great customization options, and provides high-quality audio and video output.
For anyone who wants to make tutorials, create content, or record online meetings, this tool is a great choice. Trust me, after using it, you’ll never want to go back to the default options!
Happy recording!