Working with files across different operating systems can often lead to compatibility issues, particularly when it comes to using NTFS drives on a Mac. NTFS, which stands for New Technology File System, is the default file system for Windows. While Macs can naturally read NTFS drives and access files on them, writing to NTFS drives is not supported out of the box. This limitation can be frustrating for users who frequently switch between Windows and macOS environments and need a seamless way to transfer and manage their files.
Why Can't Macs Write to NTFS Drives?
The inability of macOS to write to NTFS drives stems primarily from the proprietary nature of the NTFS format, which is owned by Microsoft. Apple would need specific licensing to fully support NTFS writing capabilities on macOS. Additionally, ensuring stability and security when writing to NTFS drives requires significant effort, which could be another reason why Apple has not fully integrated this functionality into macOS.
Read and Write NTFS Drives using NTFS for Mac
SYSGeeker NTFS for Mac - This is perhaps the most reliable and seamless method. SYSGeeker NTFS for Mac is a powerful program that allows macOS to read and write to NTFS formatted drives as if they were native macOS formats. It’s known for its high-speed data transfer and full read/write access, offering easy installation and seamless integration with macOS. This means you can perform all basic file operations such as create, delete, and modify files and folders on an NTFS drive directly from your Mac.
The software is optimized for performance, offering transfer rates similar to native macOS file systems. This is particularly beneficial for users who transfer large volumes of data between different operating systems.
Step 1. Download and install SYSGeeker NTFS for Mac on your macOS, and then launch the tool. Be sure to Allow System Extension when the option comes on your screen. You may need to restart your compute to take it effect.
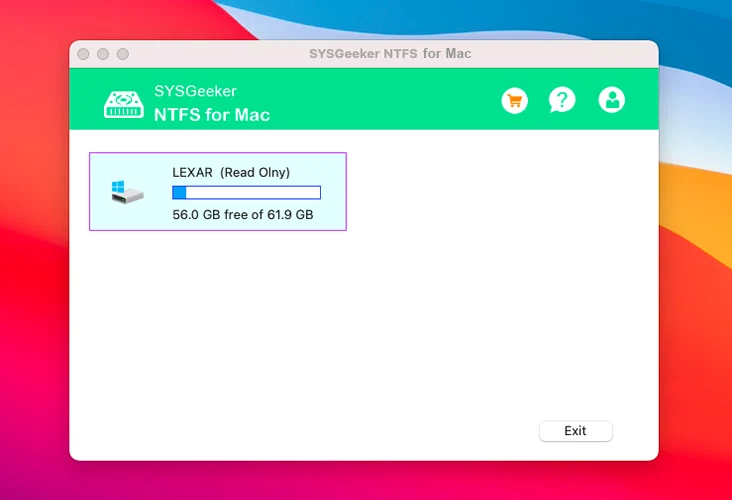
Step 2. Connect the read-only NTFS drive to your Mac. SYSGeeker NTFS for Mac will automatically recognize your NTFS hard drive and l show Read-Only tag on the program.
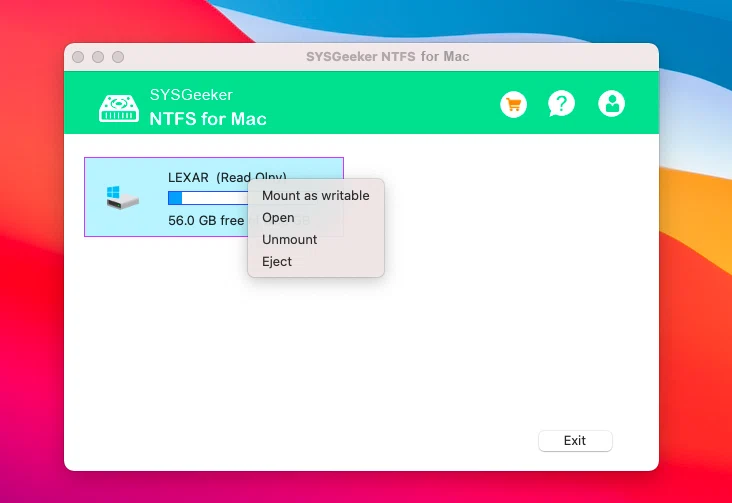
Step 3. Right click the NTFS drive icon and select "mount as writable" option.
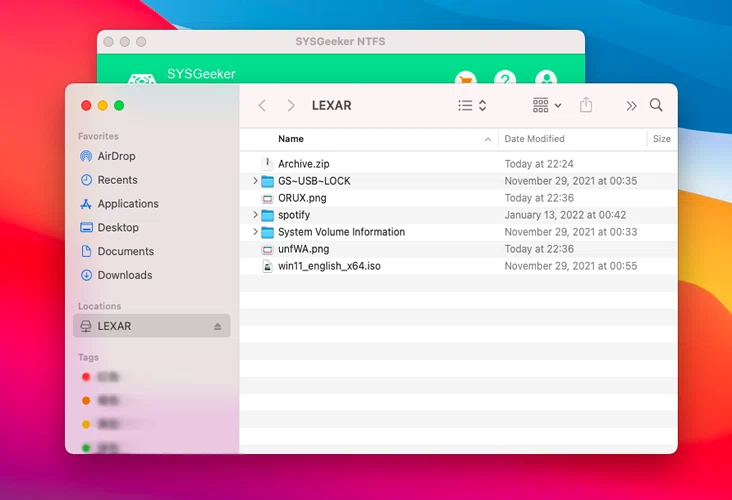
Step 4. Your NTFS drive will open in a new window, and you should be able to read and write on NTFS drive like any other drive on your Mac.
To Sum Up
While native support for NTFS writing on macOS is not available, several workarounds can effectively bridge this gap. Third-party software like NTFS for Mac is an excellent solution for users who need reliable and seamless access to NTFS drives on macOS. For those who prefer not to use third-party software, formatting the drive to exFAT is a viable alternative, especially for drives that need to be used interchangeably between Windows and Mac computers.