macOS can usually read NTFS drives, but write/edit/delete is restricted by default. SYSGeeker NTFS for Mac works around that by mounting your NTFS disk in read-write mode, so you can use it like a normal Mac drive.
This guide focuses on Apple Silicon Macs (M1/M2/M3/M4). For Intel-based Macs, see the tutorial here.
Step 1: Download SYSGeeker NTFS for Mac and install it (open the PKG and follow the installer). Launch the app once after installation.
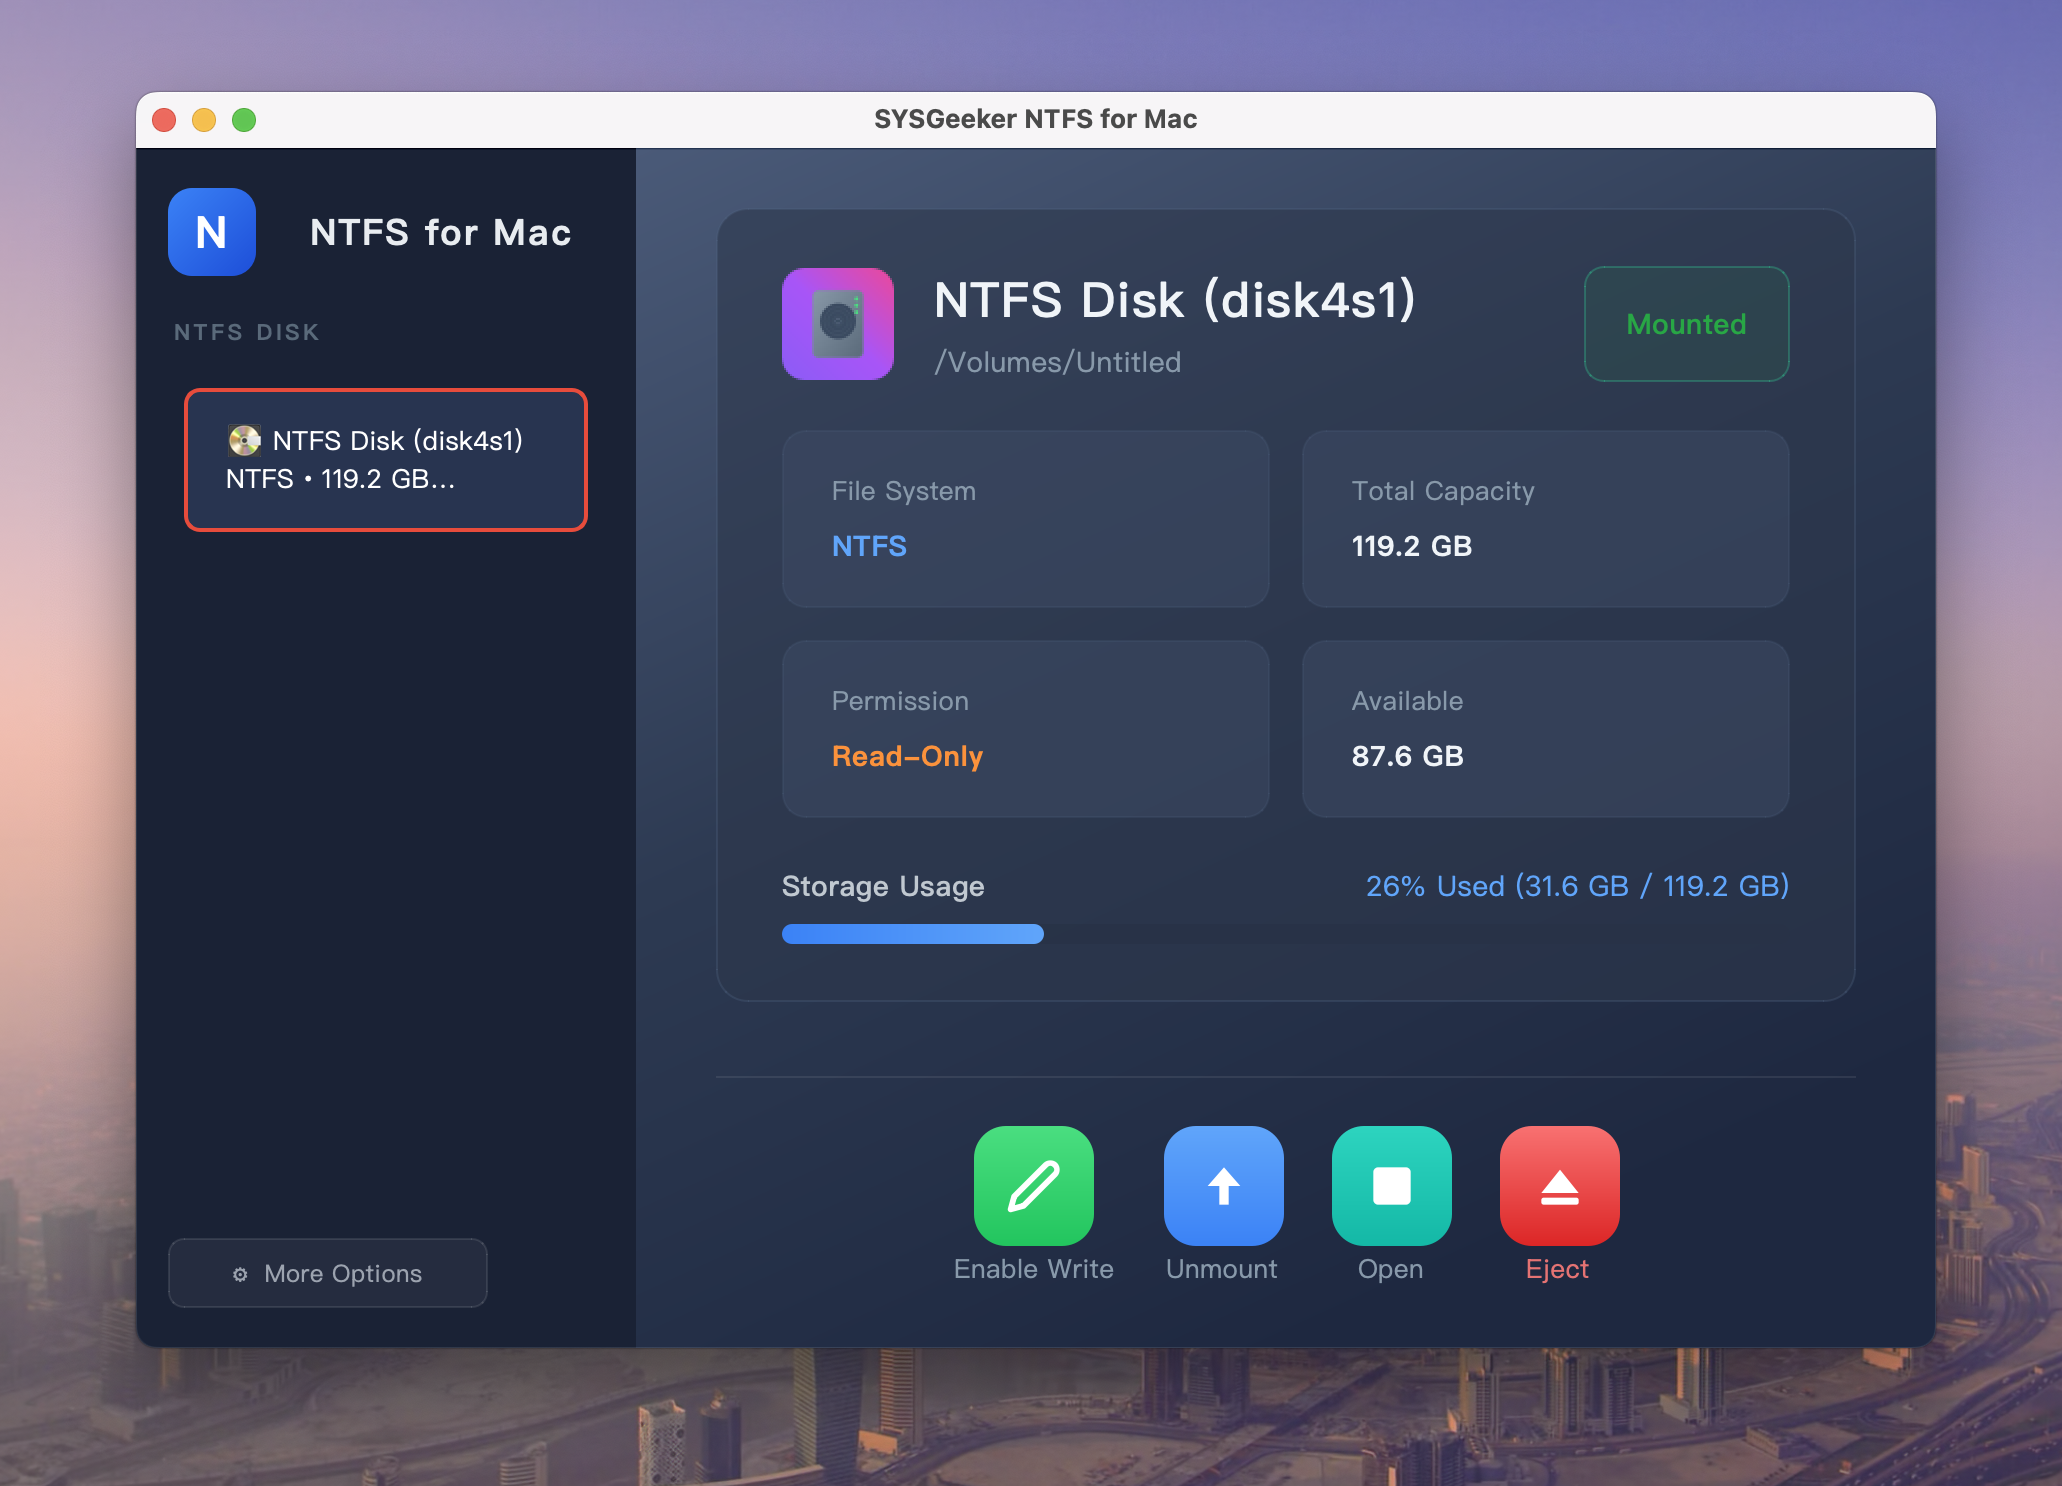
Step 2. Connect the NTFS USB / SSD / HDD to your Mac. Plug your NTFS USB drive / SSD / HDD into your Mac. The tool will detect it automatically, and you’ll see the drive listed in the app with the status "Read-only" .
Step 3. Click "Enable Write" at the bottom of the app. A "First Time: 2 Steps Required" window will pop up, guiding you to complete "Full Disk Access" and "Enable System Extension" .
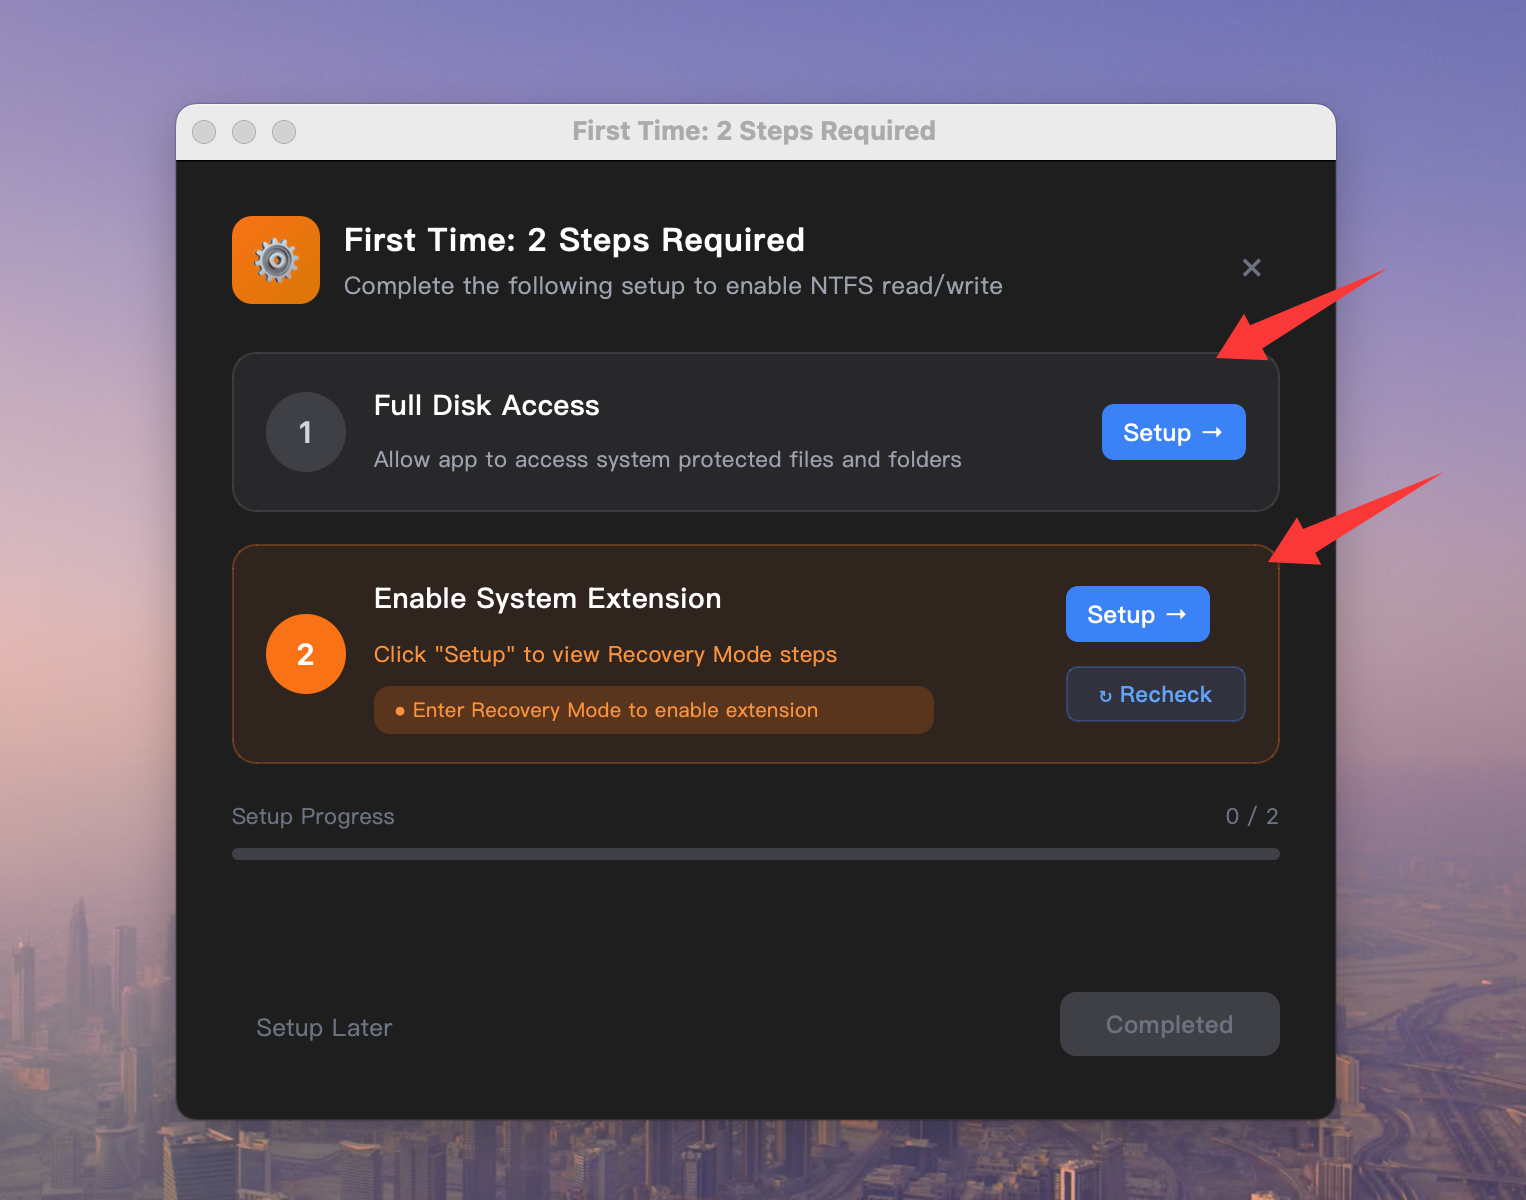
You can click the Setup button to view the step-by-step illustrated guide.
| First Time: 2 Steps Required ( For M1/M2/M3/M4 Macs) | Open Guide |
|---|---|
| Enable Full Disk Access | Check Tutorial |
| Enable System Extension | Check Tutorial |
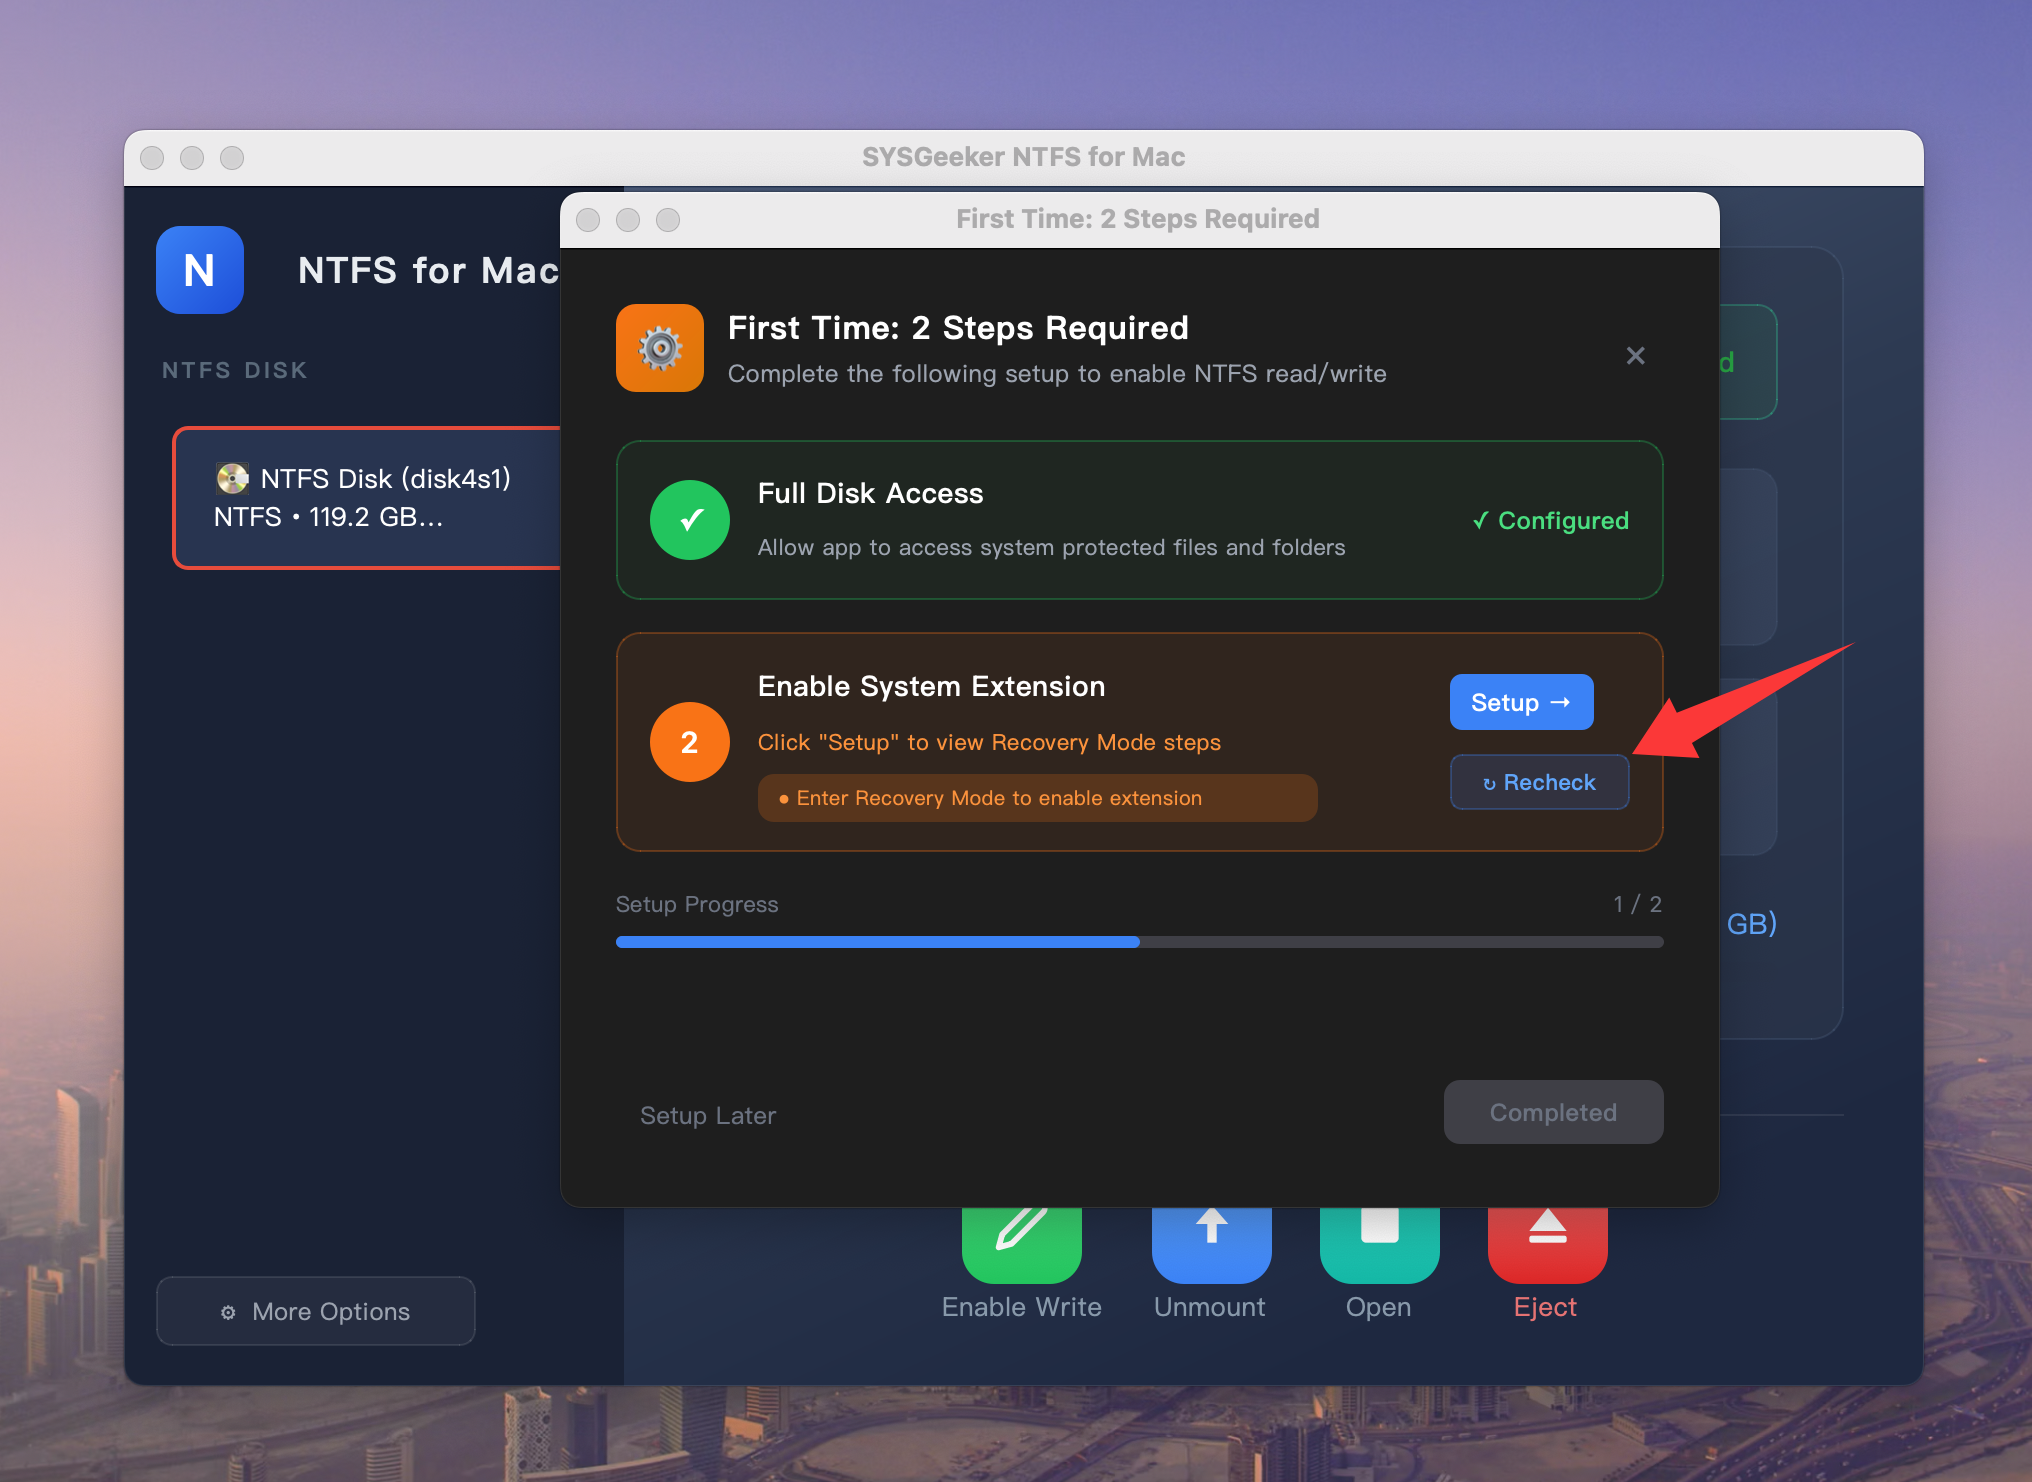
Step 4. After you finish the two required steps, the app will detect the changes automatically. You need to click "Recheck" to try loading the kernel extension.
Step 5. When you click Recheck, the app will open System Settings → Privacy & Security automatically. Scroll to the Security section, Click Allow to approve the system software from developer "Benjamin Fleischer".
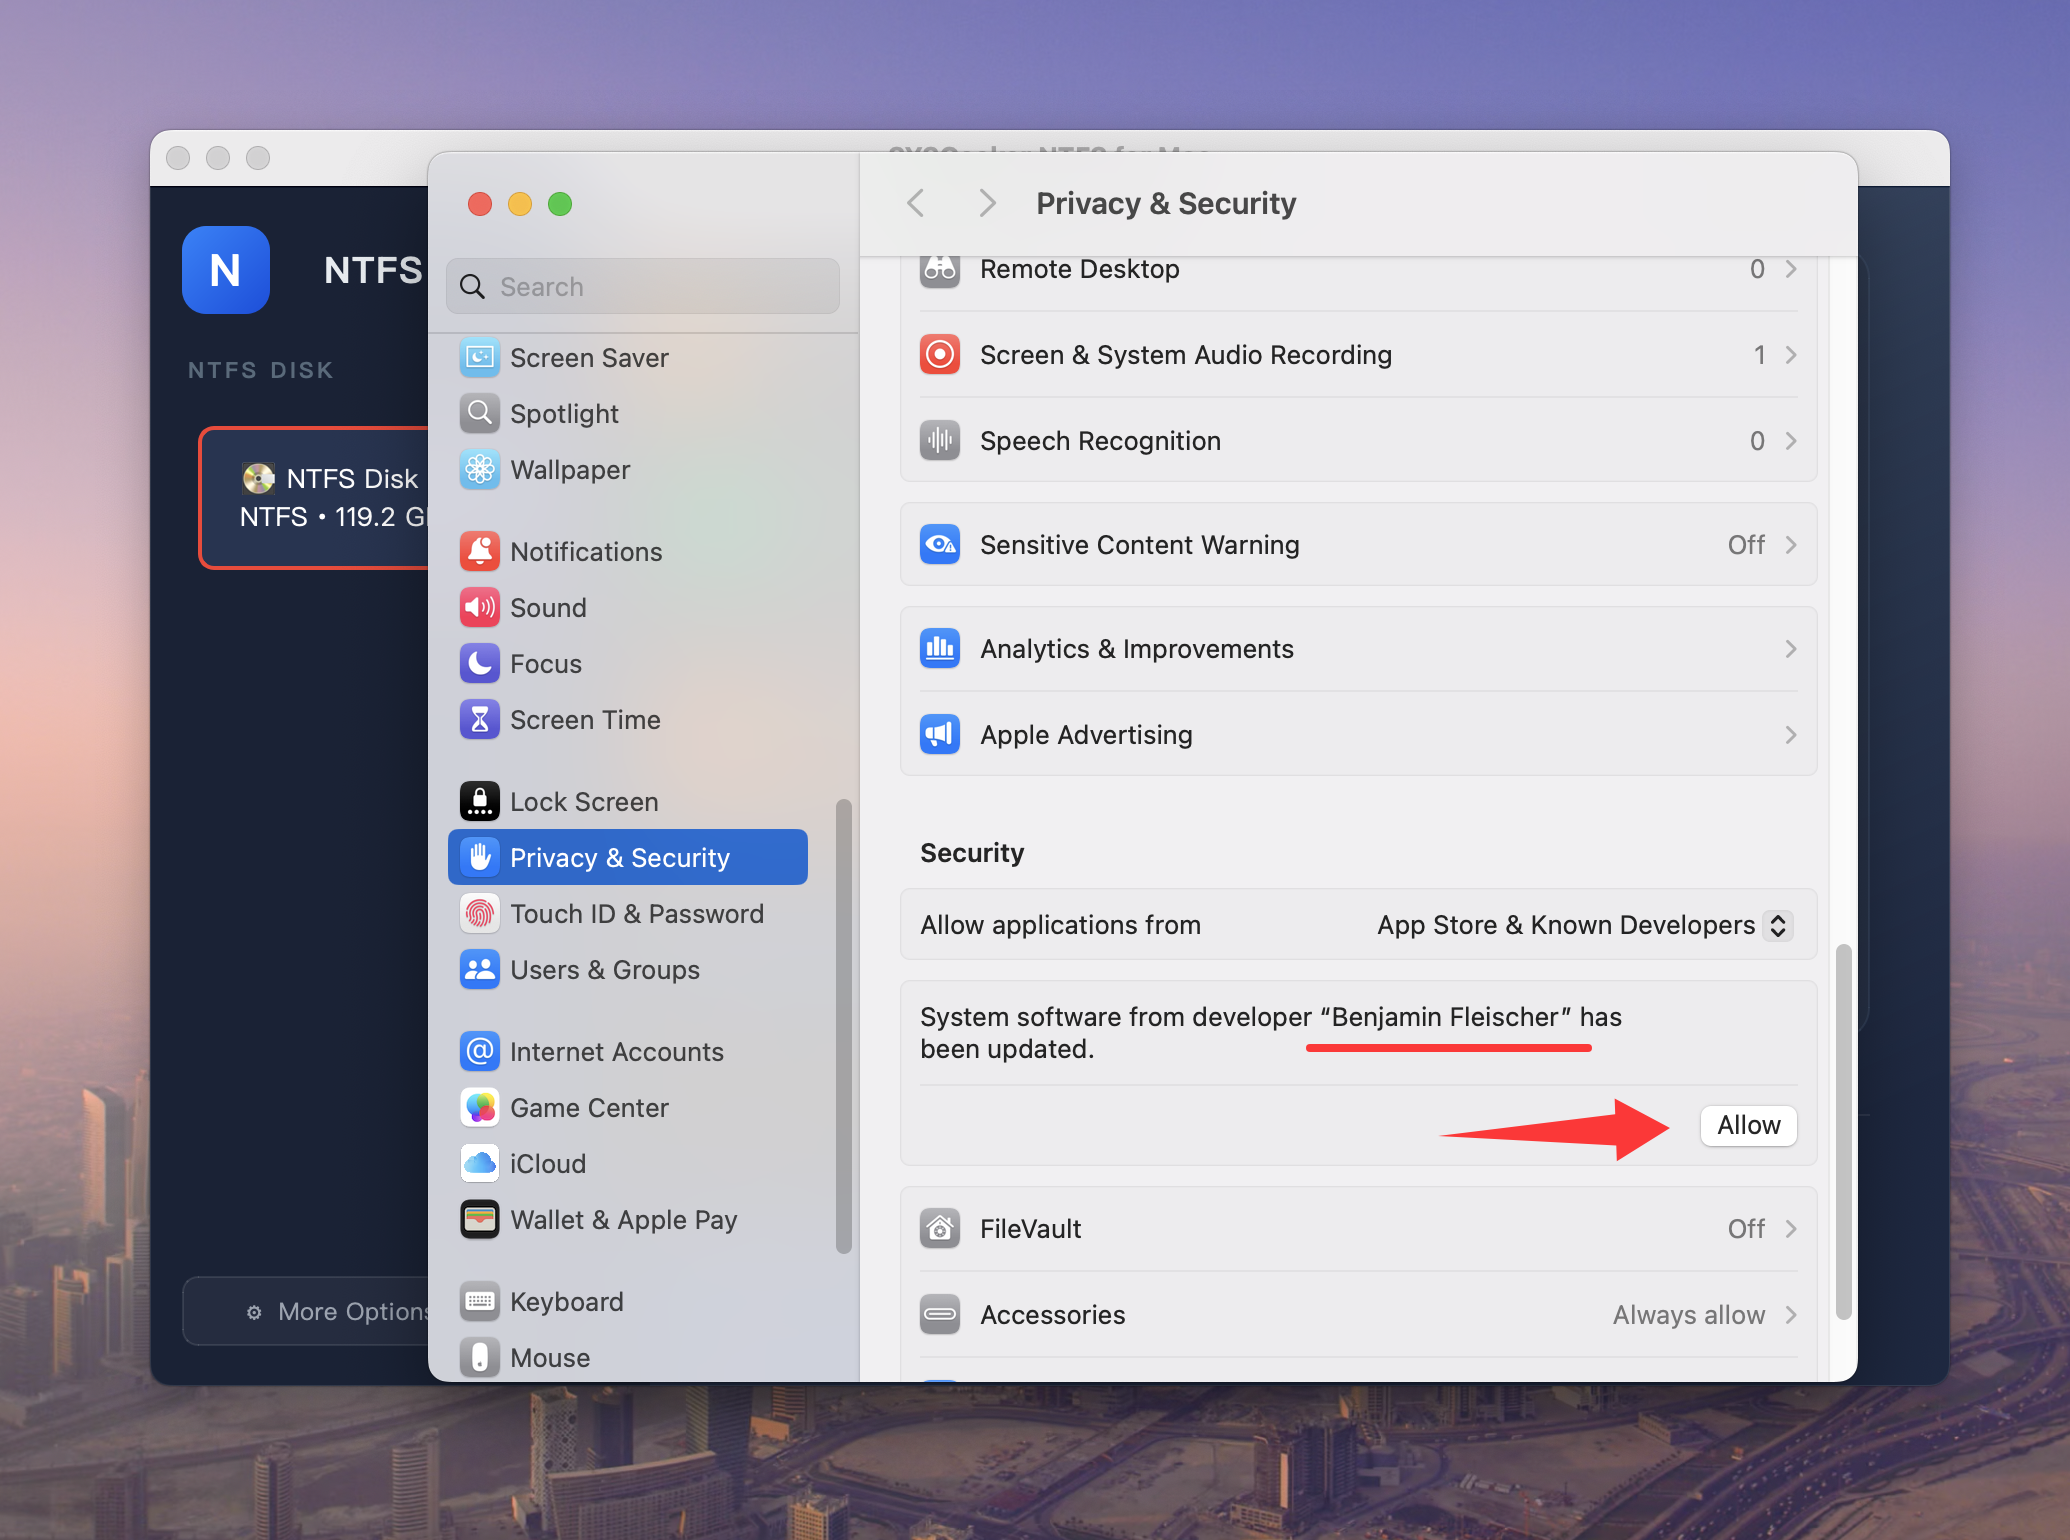
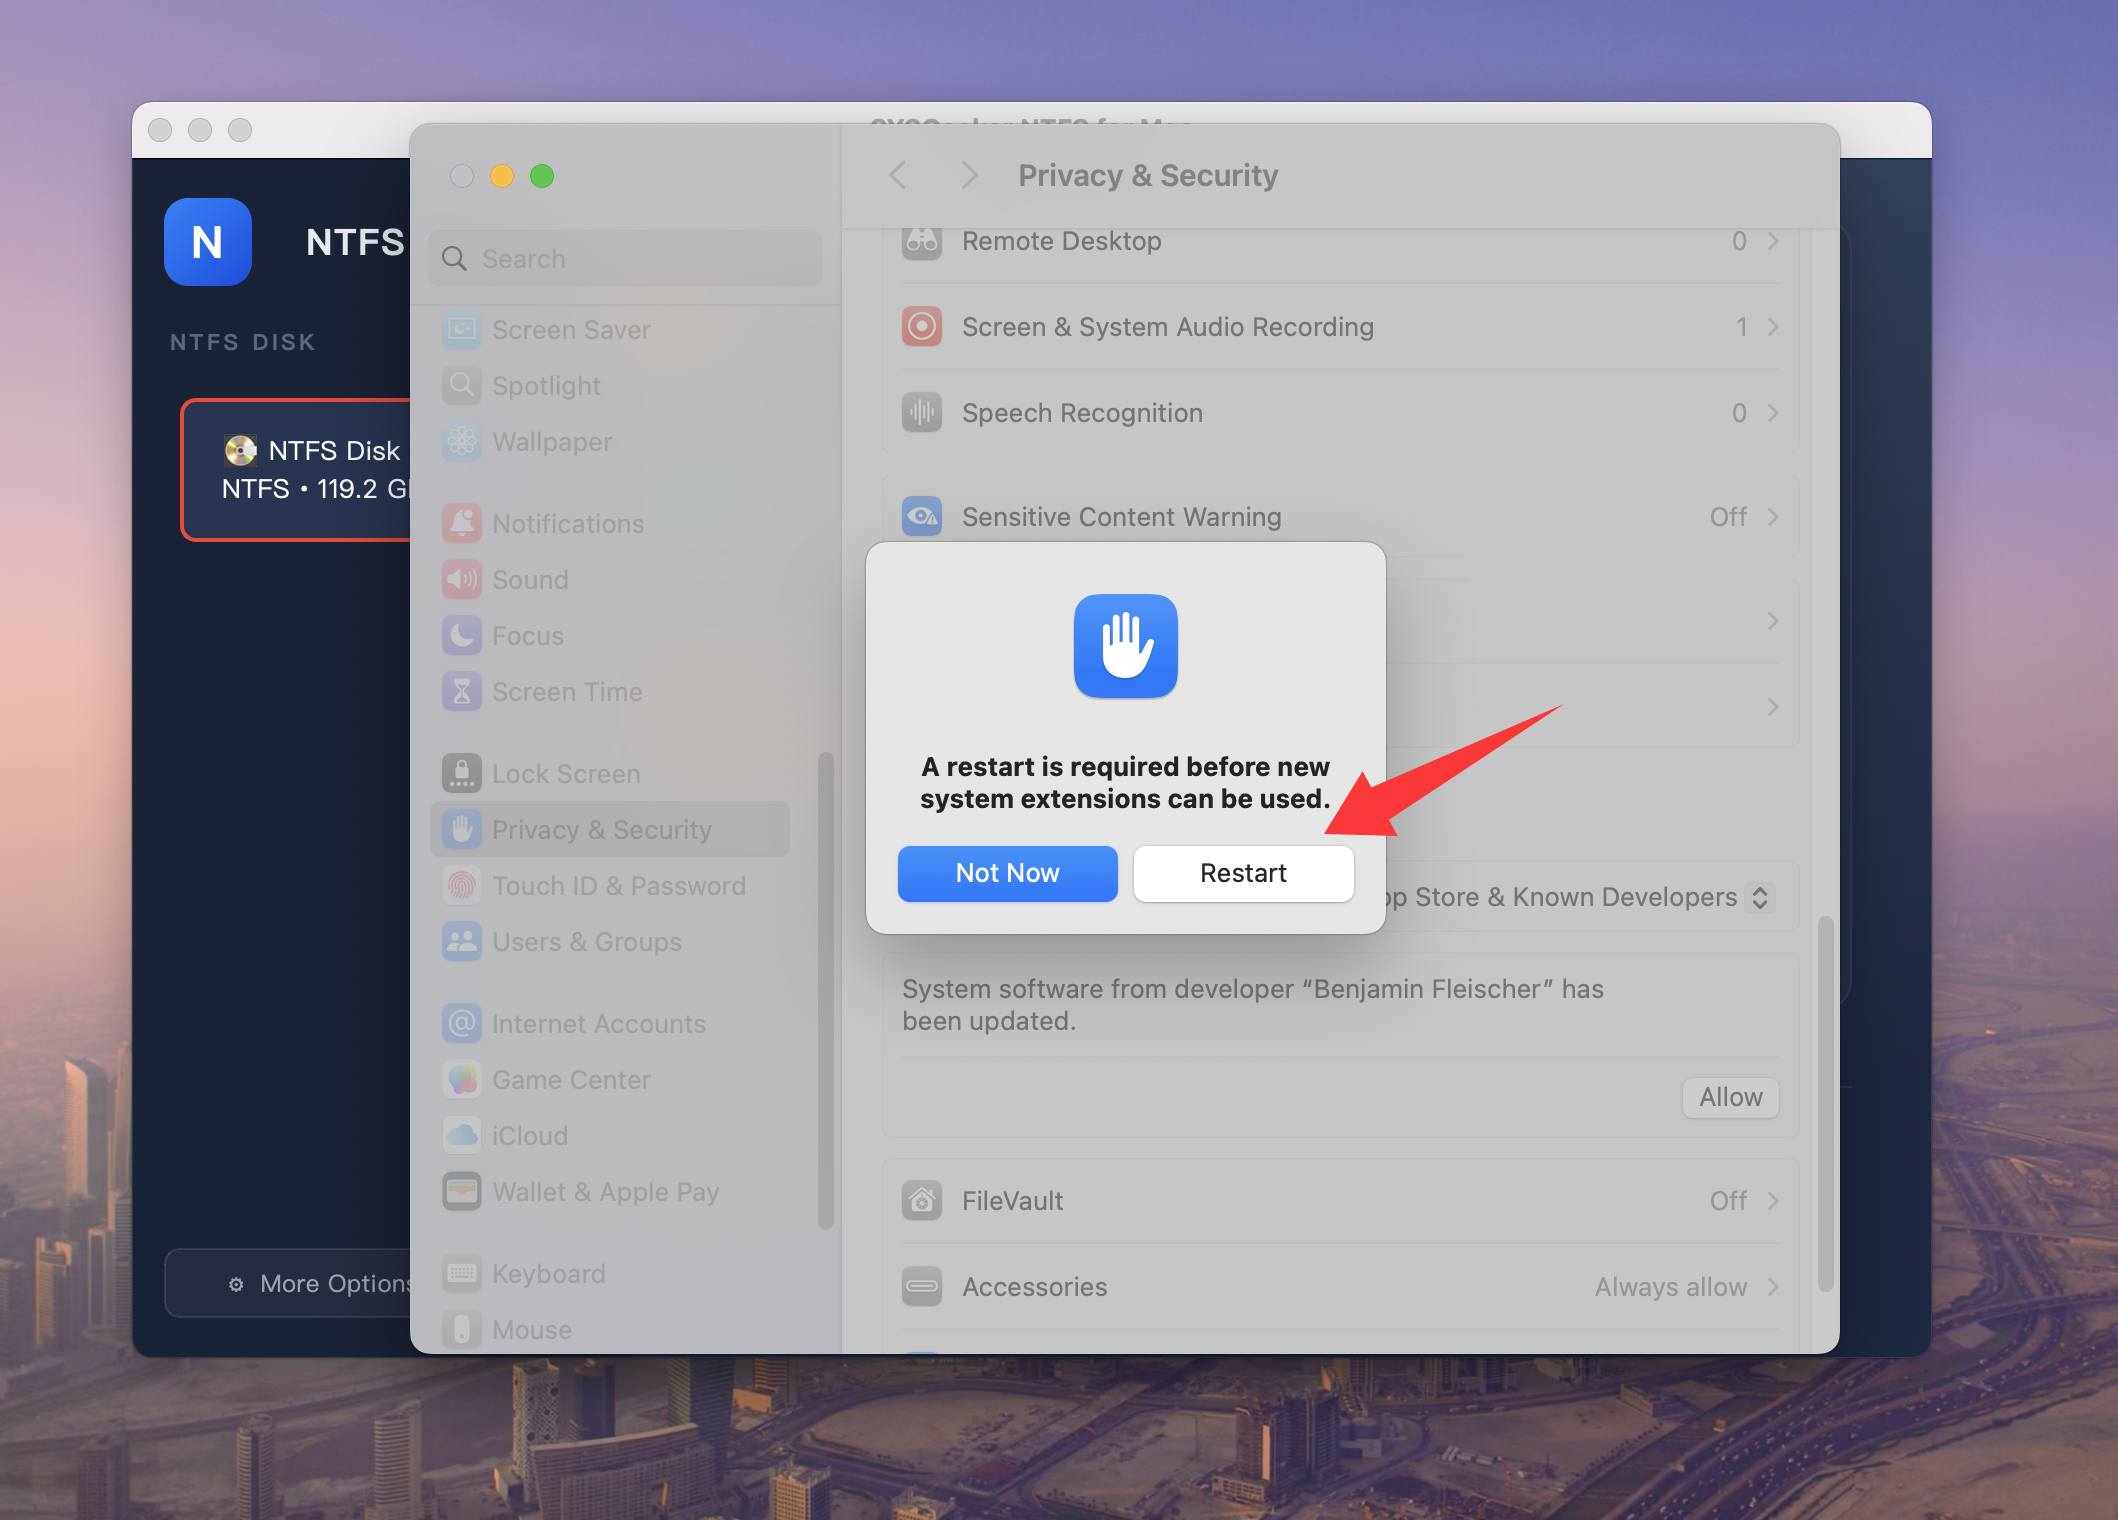
Step 6. Enter your administrator password, then click "Restart" in the pop-up dialog to apply the changes.
Step 7. After restarting, open the app and click Recheck again. This time, the system extension should show as successfully loaded. Once you see both items marked as "Configured" and "Loaded" (like in the screenshot), setup is complete—this is a one-time setup, and you won’t need to do it again.
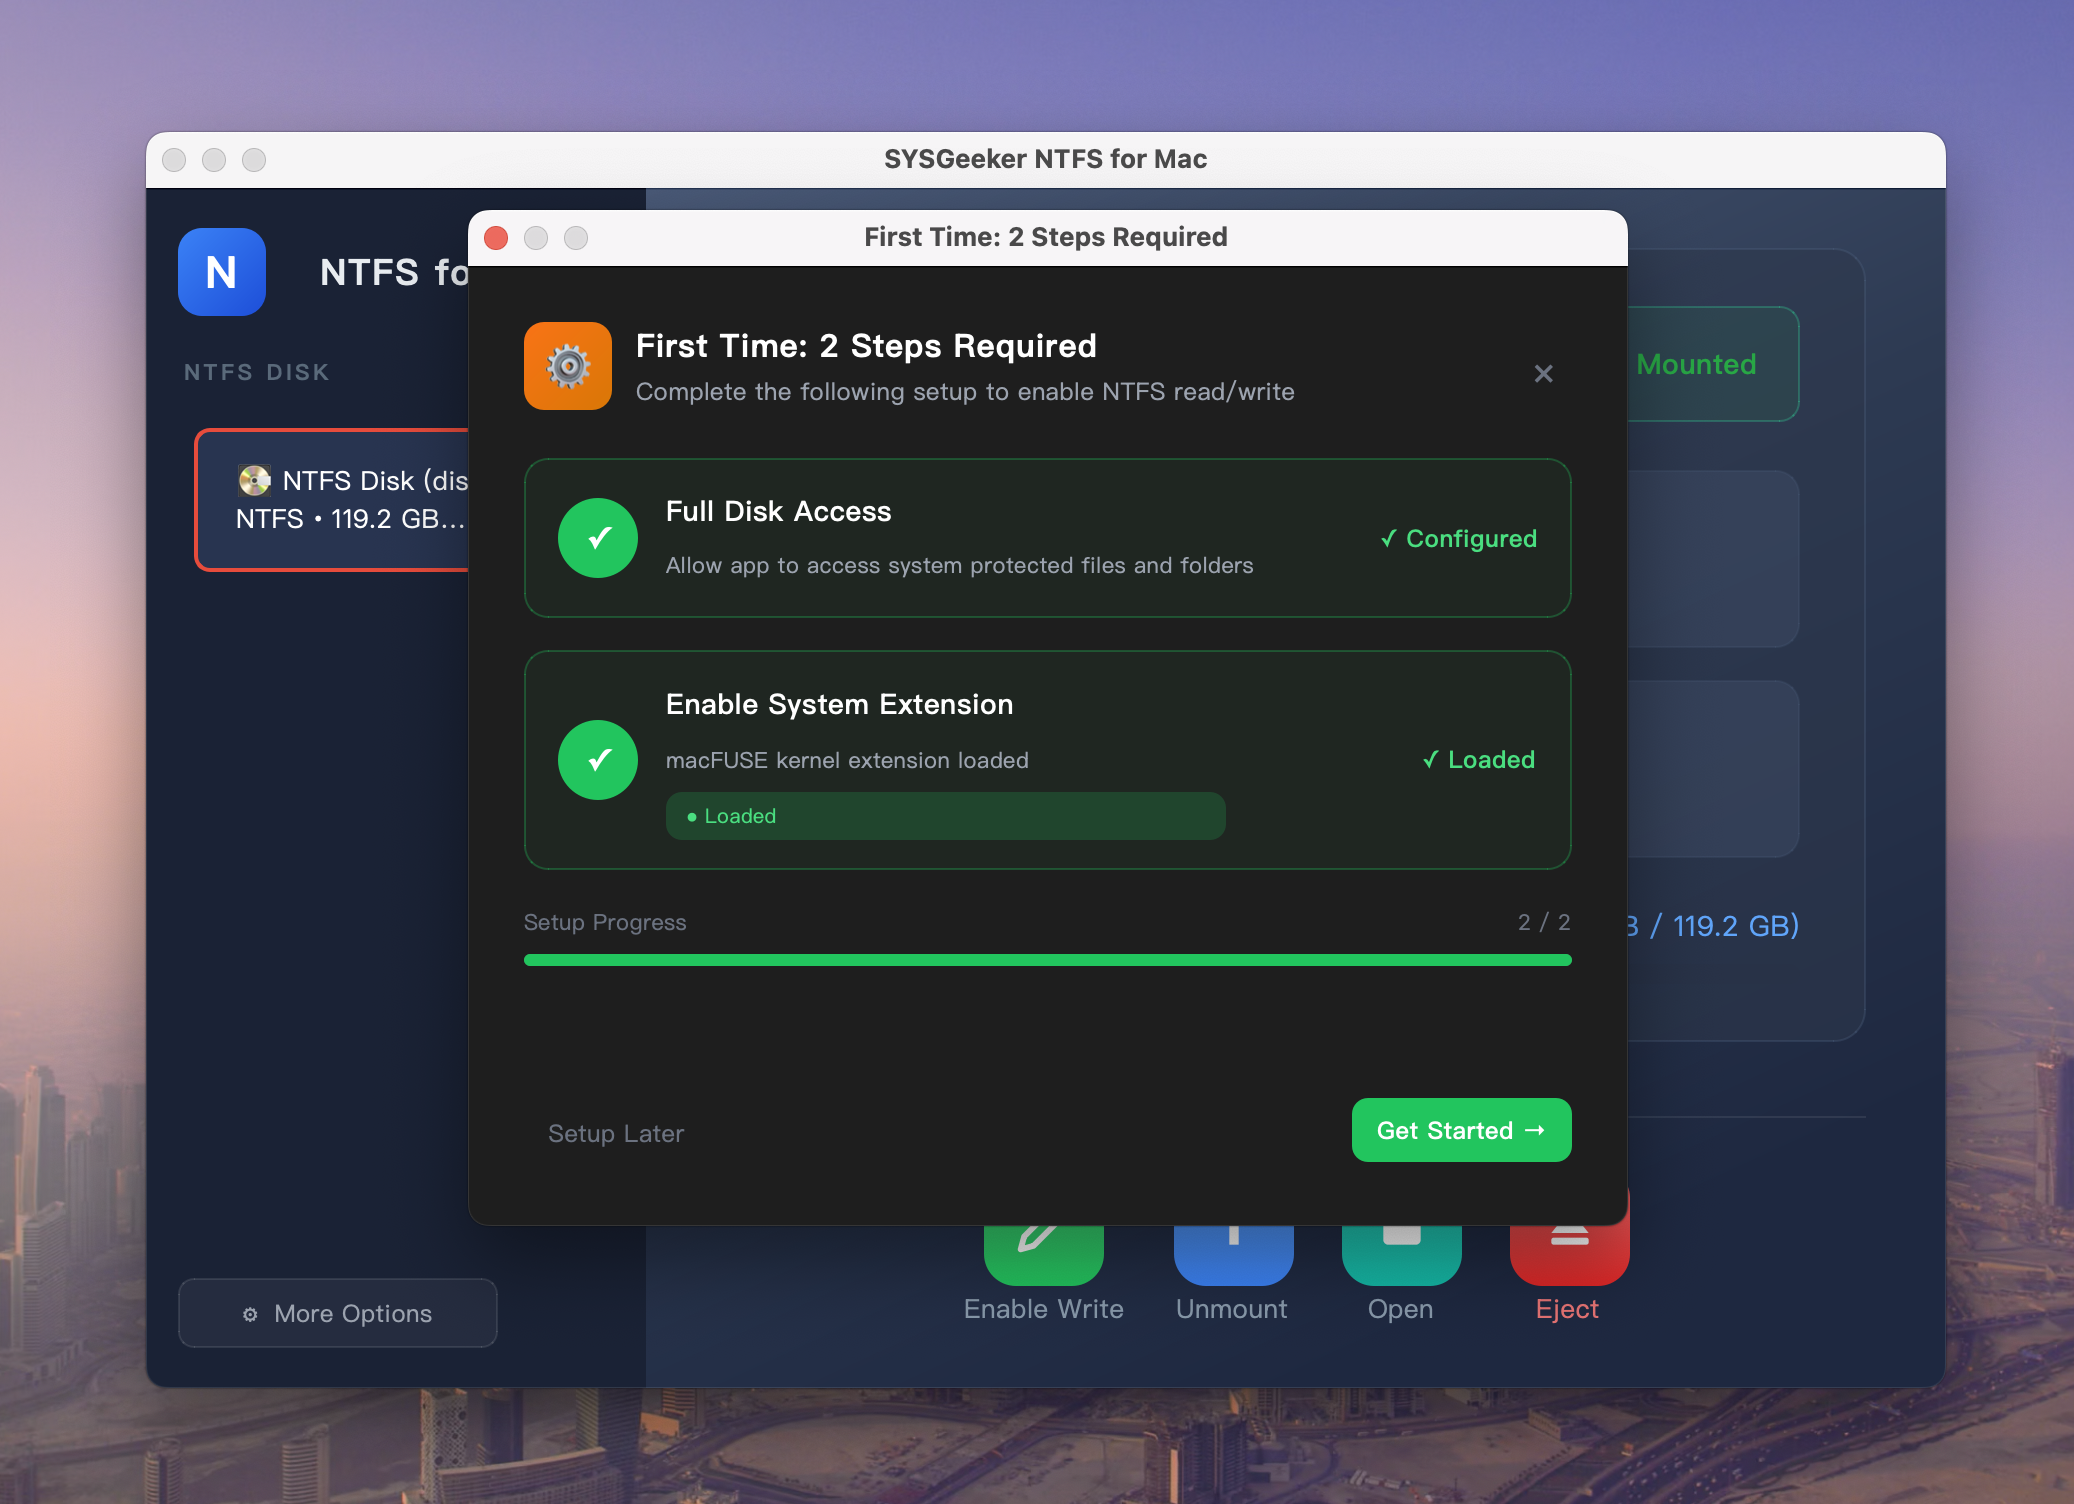
Step 8. Once both steps are completed, the app will start mounting your NTFS drive in "read/write" mode.
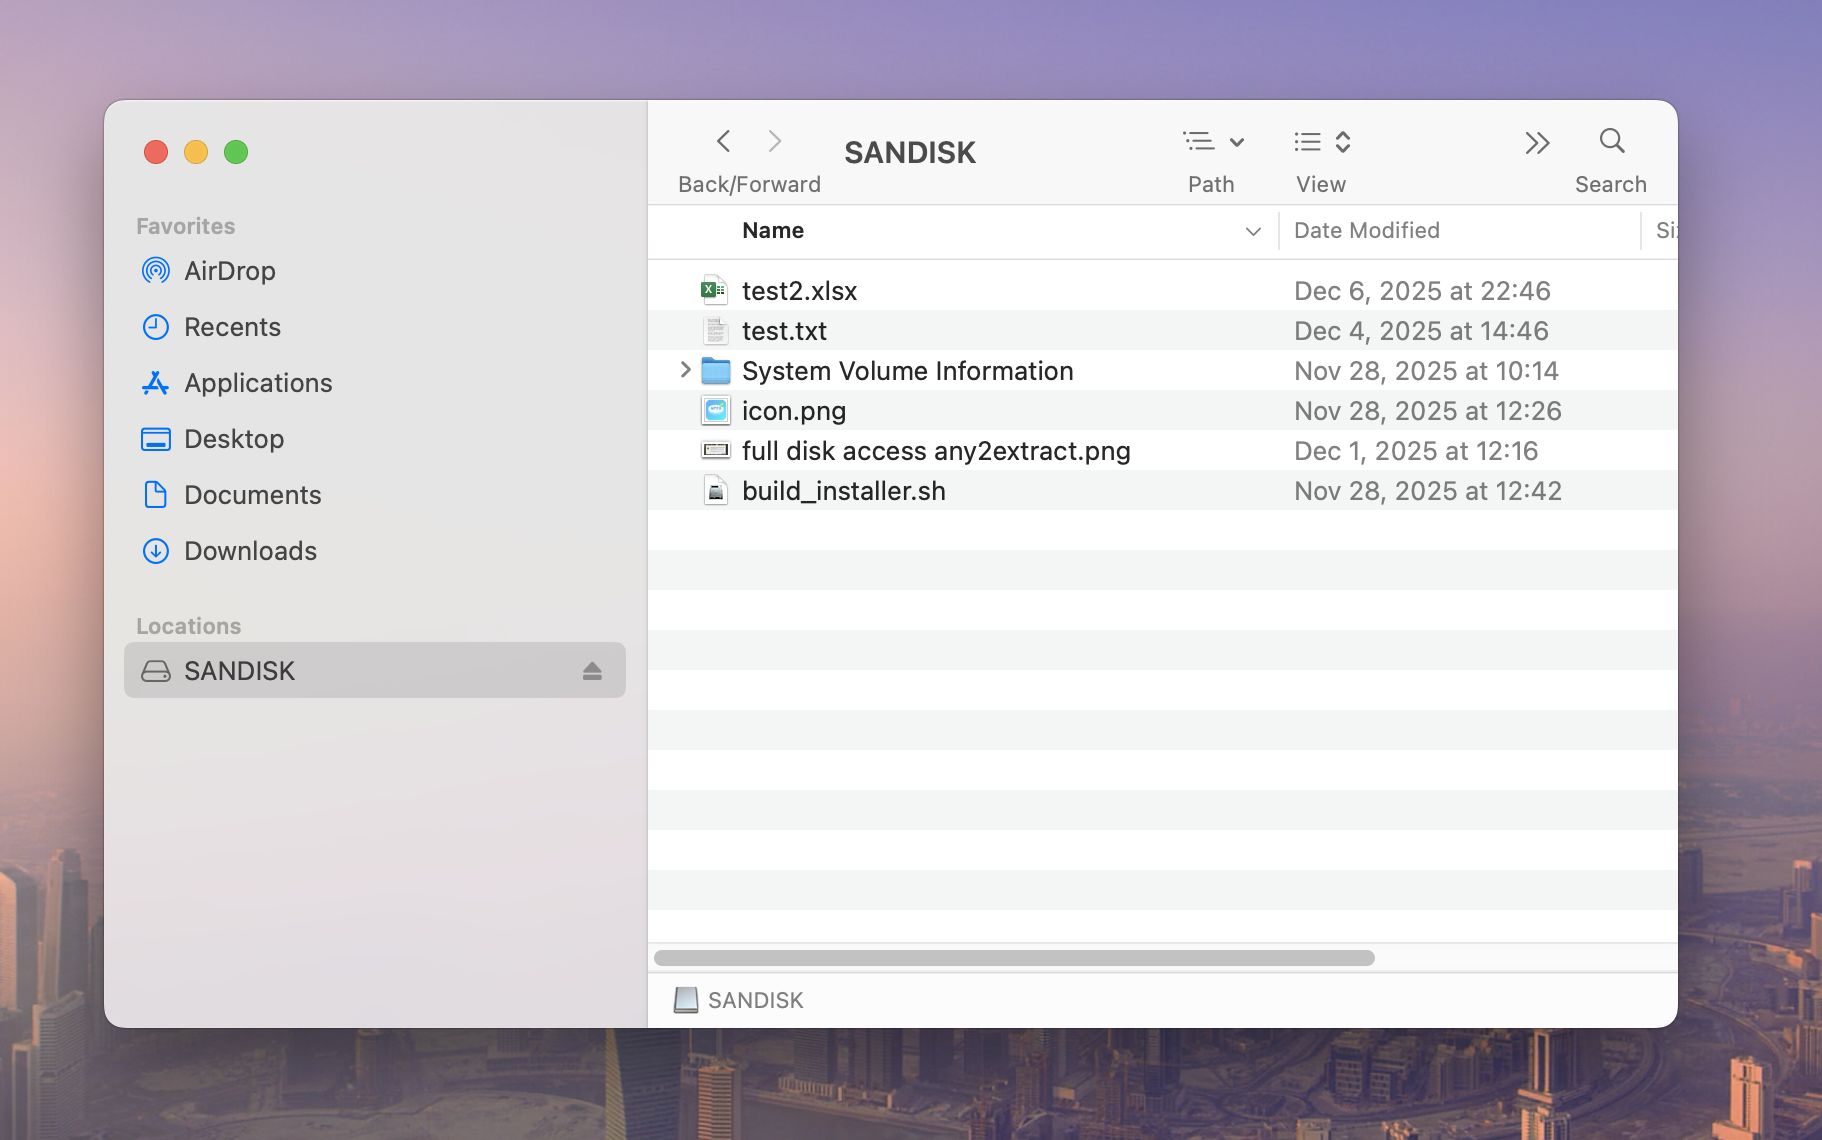
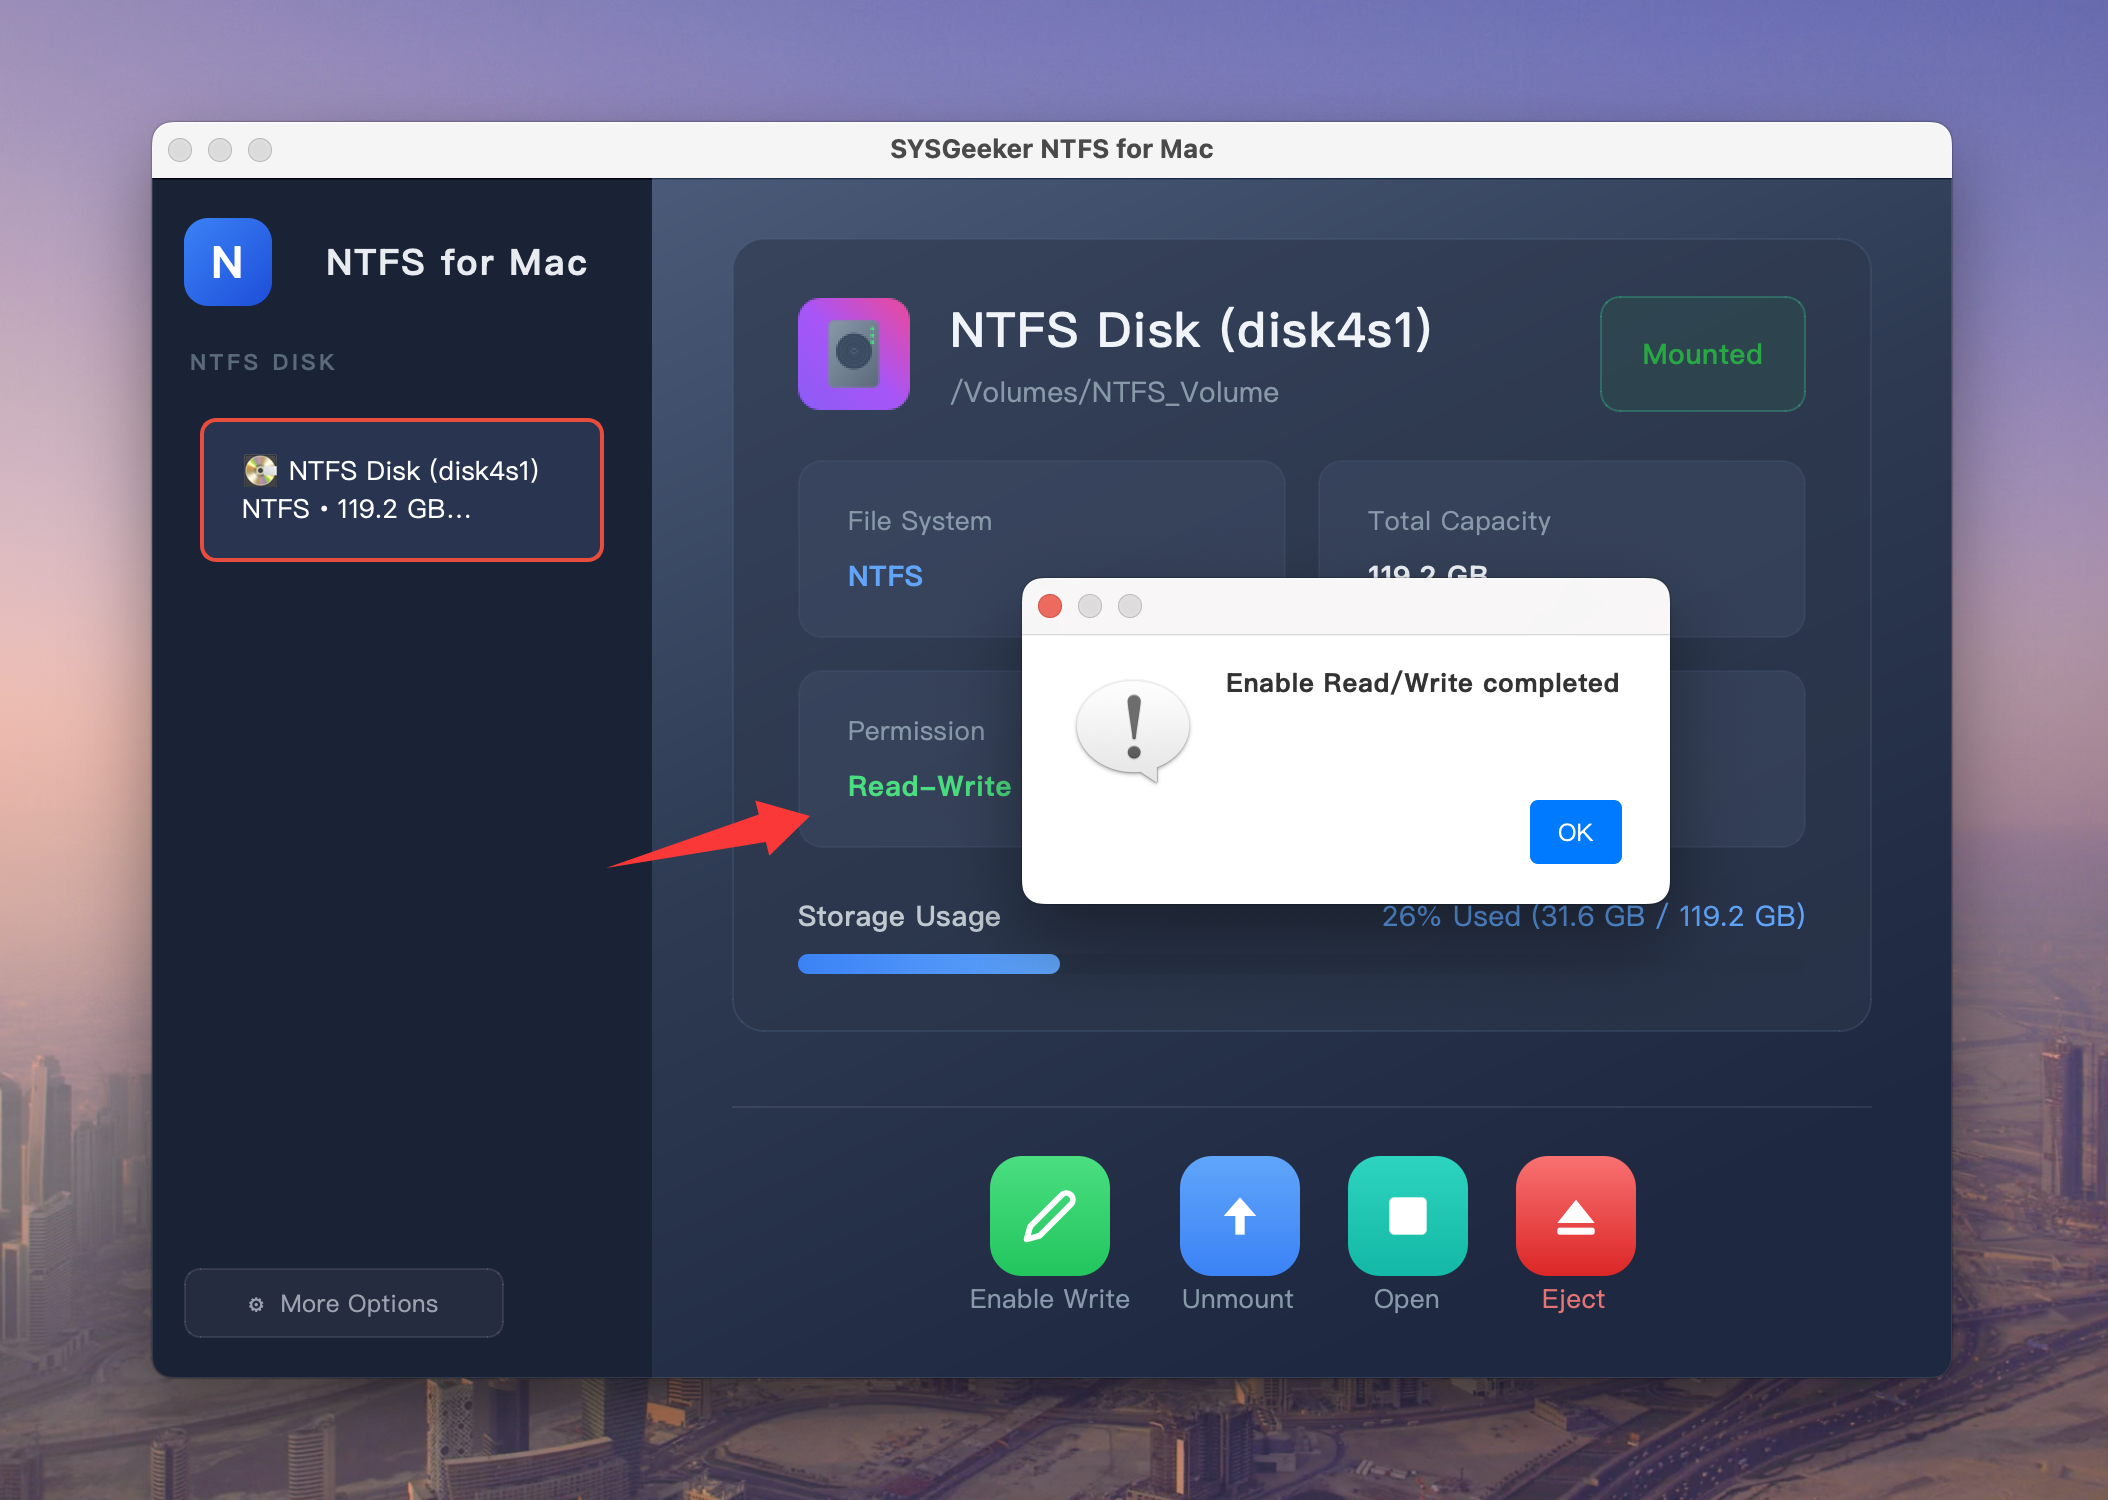
Step 9. When you see this dialog box, it means the drive has been successfully mounted in "read/write" mode. You can open the external drive from the Finder sidebar, or simply click "Open" to access it.
Now you can start copying files to the drive from your Mac. Simply drag and drop the files you want to copy to the NTFS drive or use the Finder to copy and paste files to the drive.